
 |
| Heating pad / rack. |
First, make the poolish, or sponge, whatever you want to call it. In a medium bowl, pour 1/2 cup of water (I used slightly warmer than my skin, but room temp is fine; don't use cold) and sprinkle 1/2 teaspoon of yeast over it. Stir gently with a wooden spoon to just wet it, then wait one minute. Stir with the wooden spoon again until all the yeast is dissolved. This takes a few minutes - I use the back of my spoon to squish any bubbles of yeast sticking together. I may be OCD about it, but my bread turns out nice...
 |
| Gluten on back of spoon. |
 |
| Bubbly poolish with water added. |
The next step is to mix and knead the complete dough. You'll want at least 7 cups of flour reserved for this process, though you may not use all of it. Scrape the poolish into a large bowl (that metal one I used to cover it earlier worked well for me) and then add 2-1/2 cups of tepid water (again, just barely warmer than skin) and 1/2 teaspoon of dry yeast. Break up the poolish with your wooden spoon and keep stirring gently until it's loosened up and it foams a bit. Add 1 tablespoon of fine sea salt (really here, if you're going to purchase anything special, make it the salt... believe me when I say iodized salt does nothing for this bread, though it doesn't wreck it either). Add the dough a half cup at a time and mix well in between, adding just enough to make it a very thick mass that is difficult to stir. Usually I stir until it just starts clinging to the spoon and whomping around the sides, at which point I peel all the dough off the spoon and start "stirring" with my hand. It's almost-but-not-quite kneading. Work the flour in until you have a dough stiff enough (ie still incredibly sticky but not pourable like a liquid) to turn out onto a floured piece of countertop.
 |
| Kneading the dough. |
Yes, 17 minutes. No, I'm not kidding, and don't give me that look. You want this bread to be good. Believe me when I say this step is the make-or-break for this recipe. Even if you weren't quite right on other things, if you knead the full 17 minutes you're almost guaranteed a full success.
The dough will go through stages. It'll seem sticky one moment, smooth and silky the next. Somewhere between the 12 and 17 minute mark, it will become very elastic, just barely tacky, and soft sort of like a baby's butt. It's better to have the dough be a bit moist than too dry, so don't put too much flour in.
You will know the dough is ready if you stick a finger into it and pull it out, and the dough springs most or all of the way back out. Also if you shape it into a ball, it should hold its shape and not go all saggy on you. If you're just not sure, knead more. You cannot over-knead this if you are doing it by hand.
 |
| Before.... |
Now you deflate the dough by punching it good and hard right in the center. Pull the sides up to form it into a ball again, put it back in the bowl, and cover it yet again to rise. It needs to sit in that warm, draft free place for another 30 minutes.
 |
| ... and after! |
Shape the dough into a tight ball for round loaves, or into torpedoes (big in the middle, less so at the ends), or roll it out flat to an inch or so thick, then roll up into a loaf, seal the seam by pinching the dough together firmly, and put into bread pans well sprayed or oiled.
The best way to do this part is to make your round loaf, then take a dish towel and literally rub a cup or so worth of flour into it. Get it really in there (and never use it for anything else, by the way... it'll store natural yeast for you!), and then set your round loaf onto it. Cover with the big bowl or with plastic wrap, or with a warm damp cloth and let sit for 1-1/2 to 2 hours, until increased in volume about 1-1/2 times. Again, pictures are worth a thousand words (or bad memories).
 |
| I braided one loaf. |
Up-end the dough gently onto your cooking surface, and with an VERY sharp knife give a single long cut to the top, or several smaller ones (you can make patterns, yes). Once the loaves are in the oven, take a metal bowl and fill it with cold tap water. Toss about half off it into the bottom of your oven (not near your light bulb or it could break!). Close the oven door quickly and time three minutes. Again, dump some water in the bottom of the oven, but this time leave the bowl in the oven, below your loaves. Close the door as quick as possible to keep the steam in. Bake for 20 minutes at 450F, then check. Mine were done at that point, but depending on your loaf size and shape, and way of cooking (I was on a pizza stone), you may need to drop the heat to 400F and cook another 15 to 20 minutes. The loaves should be a rich caramel color, with a firm crust. To test for doneness, hold the loaf in one hand and tap the bottom. If it sounds hollow, then it's done. If not, try another 5 mins or so and test again.
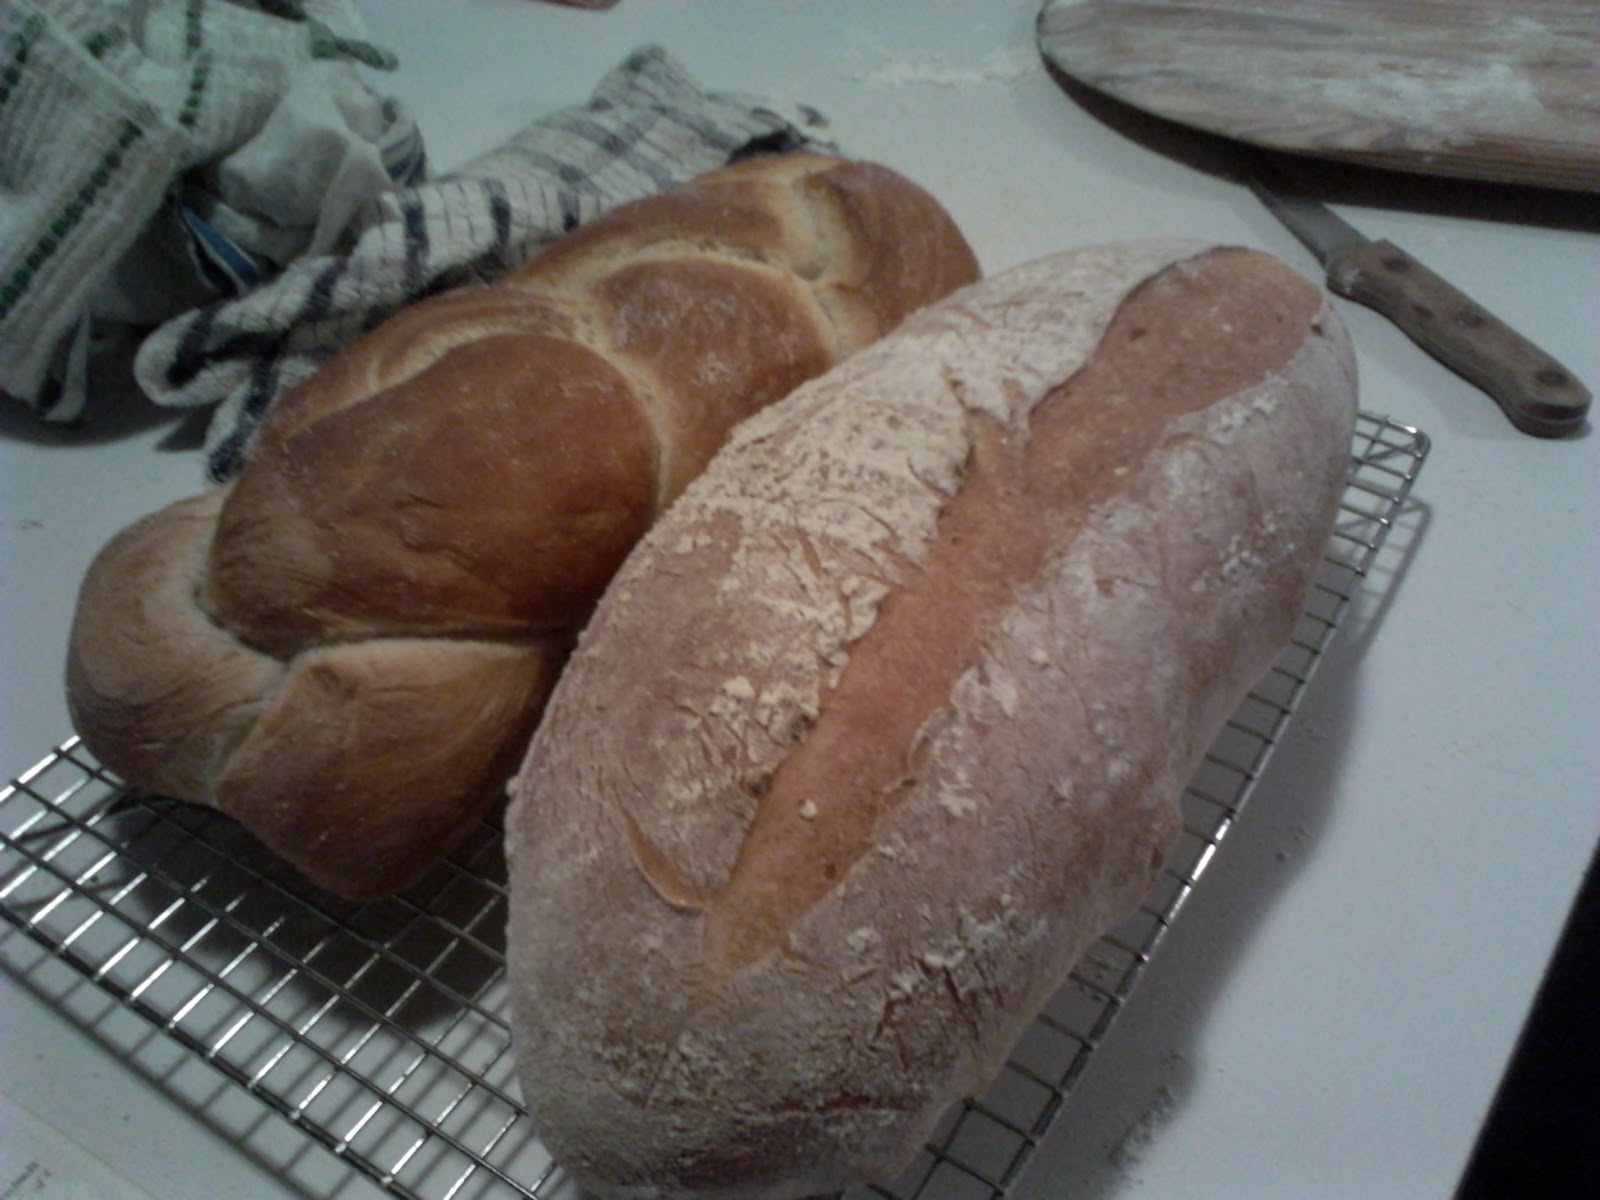 |
| Cooling... |
Slice, slather with butter, devour!
No comments:
Post a Comment