Friday, November 30, 2012

Got cheese?

I love cream cheese... (1)
There's this decadent feeling you get when you cut into a cheese ball. I don't know why cheese balls are different from any other appetizer or finger food, but for me, it leaves a rich impression. I almost always buy one during the Thanksgiving holidays, either for putting out before the main meal, or just to sit and munch on during  a movie with the kids. This year, I decided to make our cheese ball.

I was zooming around on Pinterest a few weeks ago and found a recipe for a cheddar cheese ball. I swear I bookmarked it, but when I went back to find it, it was gone. Damn you, Pinterest! After looking online and realizing I didn't have the stuff to make any of the cheese balls mentioned there, I had almost resolved myself to purchasing one last minute, when a light bulb came on.

If all those other people can mix stuff together, so can I! I can cook, so I can make my OWN cheese ball recipe! And so I did. This is the result, and I am happy to say there was squabbling over the remains of it.

Ingredients:
2 packages room temperature cream cheese or neufchatal
1 tbsp black pepper
2 tbsp pesto
1 clove minced garlic OR 1/2 tsp dried minced garlic
several tbsps each of parsley and chives, minced

In a large bowl, mix together the cream cheese, pepper, pesto and garlic. I use the MixMaster with the paddle and it whips right up. Using a rubber spatula, form it into a ball shape in the bottom of the bowl and set aside.

On a large piece of plastic/saran wrap, lay out a layer of the mixed parsley and chives. I used fresh parsley, minced up with my mezzaluna, but my chives were freeze dried because I couldn't find fresh and my garden ones were pretty sad. Flavor-wise, I was glad I went with the freeze dried ones, because if I'd used my own dried ones, the taste wouldn't have been as good. Spread the herbs in a thin layer, then pick up your cheese ball and sort of roll it around on the herbs. They'll stick to the cheese.

Set the ball in the middle of the plastic wrap and bring the sides up. Twist the top closed firmly, so that the cheese and herbs are held together in a tight ball in the wrap. Now chill it for at least four hours. I made mine the night before, and it was just the right consistency.

Cheese ball heaven
This cheese ball turned out marvelously. It was nice and herby on the outside, and light green on the inside (the pesto turned the neufchatal green!). It was spreadable, attractive, slightly spicy from the basil, and gone before I could get a decent picture of it. This is the sole image of my cheese ball! The little "Christmas tree" is a cheese spreader that we had. It looked like there was a little tree sitting on a grassy hill.

Have you ever made your own version of a recipe before? What's your favorite? Care to share?

PS: We've added this post to the Homestead Barn Hop #90! Click the Homestead button to share your homesteading post.

Check back often for information on canning, preserving, general homesteading and more. If you have questions or comments, please write to me below. I love to answer questions! You can follow the blog via Network Blogs and Google Friend Connect (see the left hand column for the button). If you purchase items I have linked through Amazon or the ads on my site, I receive an affiliate portion of the sale. If you find the items are useful, please purchase from my site!
 
You may also be interested in:

Rendering turkey fat
Making turkey broth from your leftovers
Protein - it's good for you!
Creamy Potato Soup
Prepping 101

1) Photo by Renee Comet / Wikimedia Commons

Wednesday, November 28, 2012

Wicked Good Wednesday!

Wilderness Wife has a neat "blog party" each Wednesday at her blog. :) Go have a peek and see if there's anything you'd be interested in! Click the link to visit Wilderness Wife!

Tuesday, November 27, 2012

A Vacant Lot Offers Refugees a Taste of Home - NYTimes.com

A Vacant Lot Offers Refugees a Taste of Home - NYTimes.com

Old ideas are suddenly new again. In Phoenix, AZ, the mayor has started using vacant lots as city vegetable plots. Families are growing food for themselves and to sell to local grocers, making lives just a little bit better and a lot more sustainable. The Victory Garden is making a come-back, and America has made a tiny step into self-sufficiency again. Let's just hope that other cities follow suit, until we see green springing from corner lots and backyards across the country!

Monday, November 26, 2012

How to render turkey fat

Rendered turkey fat
There are a lot of things you can do with left-over turkey, and I'm sure that everyone's getting their fill of it by now. Whether you had your feast on Thursday or the weekend, the likelihood is that you have a significant amount of turkey in your fridge or freezer, and are wondering what to do with it all. I'll touch on a few recipes this week, some easy and some more labor intensive, but first I want to cover the basics - what to do with all that fat!

Believe it or not, turkey fat isn't as bad for you as butter is. It isn't as bad for you as most vegetable fats like canola or "vegetable oil" and is naturally low in saturated fats. If your turkey is pasture fed, it's also full of a lot of necessary vitamins and minerals. This means you can save that turkey fat and use it in any recipe that calls for lard or animal fat, and it can be used in place of butter.

Fat on top of broth
Before using your turkey fat, though, you need to render it. The process of rendering fat (of any kind of animal) means to remove all the non-fat from it. For me, that meant all the little bits of turkey that remained in it, as well as some herbs. It's not a difficult process, but it does take a bit of time and patience.

The easiest way to get at the turkey fat is to take all your leftover skin, bones, gristle and assorted drippings, put them in a big pot, and make stock from it. Once your stock is made, set it outside (if it's cold enough) or in the fridge until it is thoroughly chilled. The fat will float to the top and harden.

Removing fat with a spoon
Fat in a bowl
Once the fat is hard, remove it with a slotted spoon to a bowl or small sauce pan. The broth can then be heated and canned or poured into containers and frozen. Your broth will be largely fat free, because you will remove the majority of it!

The fat can then be heated on top of the stove to melt it. Use a medium high heat, and it will melt down very quickly. You'll see in the picture that my fat has bits of herbs in it, which floated to the top and got stuck there. Before finishing, I need to remove those herbs. They will go bad if they are not removed, and that will ruin your fat!

Melting turkey fat
Once the fat is melted, but before it gets really hot, pour it through a coffee filter to remove the last of the impurities from it. This helps make sure there are no bits of meat or bone or herb left in it, which might cause it to go rancid. If it doesn't look clear, re-heat it and pour through another filter. This is the most important part of rendering, and it makes a huge difference on both the length of storage of your fat, and the flavor (donuts fried in fat that contains meat are going to taste a little funny, and let's not even consider what will happen if you're washing your face and bits of old turkey end up on it!).

Removing the water
When the fat is completely strained, put it back onto the stove in its pot and let it come to a full boil. It will hiss and spit quite a bit, usually, as it steams and cooks out all the water. Continue to cook the fat on a low heat (just enough to make it bubble but not enough to cause it to boil over) until all the spitting stops. This can take anywhere from a few minutes to hours, depending on how much water is in your fat. If it looks like it'll be taking a long time, consider doing it in your crock pot on high, where you can leave it without worry of spilling over or burning.

The finished product can be stored in air-tight containers in the fridge for about three months, or in the freezer for up to a year. Turkey fat can be used in place of palm oil in soap recipes, and can be used for making pastries or anything that asks for butter or lard. It will harden up in the fridge until it looks just like store-bought lard, although it will be a darker color.

Check back often for information on canning, preserving, general homesteading and more. If you have questions or comments, please write to me below. I love to answer questions! You can follow the blog via Network Blogs and Google Friend Connect (see the left hand column for the button). If you purchase items I have linked through Amazon or the ads on my site, I receive an affiliate portion of the sale. If you find the items are useful, please purchase from my site!
 
You may also be interested in:

Making turkey broth from your leftovers
Protein - it's good for you!
Creamy Potato Soup
Prepping 101
Hungarian Cabbage Rolls

Thursday, November 22, 2012

Making turkey broth from your leftovers

Brine soaked, oven roasted turkey (1)
Ahhh... The pleasantly full feeling of satisfaction after the turkey has been devoured. The parade has been and gone, and you're half way through the Purina Dog Show when it hits you. You have two weeks worth of turkey sitting on the counter in the kitchen, and no room in the freezer for it because it's full of the other leftovers. Oy...

Well, ladies and gents, I'm here to tell you that this is not your worst nightmare. Indeed, it is your Lucky Day! Hooray for leftovers and especially for leftover turkey! Rejoice, because you are about to make ... BROTH!

Making and canning turkey broth is very simple, and better yet, takes up no refrigerator or freezer space at all. It does require a pressure canner, though, so if you don't have one then you'll need to squeeze the broth into the freezer after all. However, if you can beg, borrow or steal a pressure canner for just a few hours, you can make this, put it on your pantry shelf, and have a ton of home-made broth ready for any occasion.

I'm going to be making our turkey (on Saturday, not today, because we like to celebrate Thankfulness by being damn thankful we're not stuffing turkey butt at 6am LOL) in a Westinghouse roaster, but this recipe translates just as well to a regular roasting pan in the oven. The major difference is that if you're using a regular roasting pan, then you'll need to scrape the leftover contents of it into a large stock pot, whereas with the Westinghouse, you just continue right on without doing any extra dishes (there's that thankfulness again!).

Bacon wrapped turkey (2)
When you're finished roasting your turkey, you'll serve it up either whole or disjointed, and people will feast. The leftovers will likely sit on the platter for an hour or two while you burp and digest and generally allow the tryptophan to sooth your frazzled soul. Once you recover enough, brave the kitchen mess and pull off the majority of the meat from your bird and toss it into baggies in the fridge or freezer. Plastic containers will also do. Do reserve some for later, though, for adding to soup (if you make some) and sandwiches (for the day after).

All that jellied stuff in the bottom of the pan, all the drippings left over from making gravy, all the bones and the whole carcass can be slid right back into your Westinghouse, or alternatively into a large stock pot. If it doesn't fit, hack it into pieces that will. You don't need pretty or neat, here; just make it fit. You'll be straining it later anyhow.

You can add many of your leftovers to the broth, if you like. Any onions and carrots (provided they're not candied) can be tossed in, as well as leftover gravy, green beans (so long as they're not in a cream sauce), cabbage, parsnips, and other root vegetables. Avoid potatoes, both sweet and regular, as they tend to make the broth a bit gritty sometimes. Fill the pot or Westinghouse with water, add a teaspoon each of salt, pepper, paprika, oregano and thyme, and then set the broth to simmering.

Making soup (3)
Ideally, you want to let it simmer overnight, however as long as it gets several hours of cooking you should be fine. Your broth should not come to a full boil during this process, or it won't be nice and clear (although it doesn't change the flavor much, in my opinion). Eventually, the carcass will fall apart, the neck bones will disappear into a mass at the bottom of the cooking container, and the vegetables will likely turn to complete mush. All this is fine. You may see a frothy scum at the top of your pot, and this should be skimmed off with a wooden spoon. Fat, on the other hand, should be left on the top for now. You'll remove that later.

During the later part of the cooking process, take a few sips of your broth. If it needs something, feel free to add it. Likely requirements will be more salt, and possibly such things as oregano, thyme, bay leaf, rosemary, and other "stuffing" herbs, as well as more onion, garlic, or chives. Don't be afraid to experiment, but use small amounts. Keep good records as you go through this process, because it will streamline the process for next time!

When the broth is done, you need to strain it. Line a colander with cheesecloth (or an old tee shirt or towel if you don't have cheesecloth) and pour the hot broth into another container (or two, if you're like me and make several gallons worth of broth). Remember to use hot pads and keep your face out of the steam!

The contents of your cheesecloth can be thrown away. At this point they are devoid of nutritional content and you can rest assured that you've plumbed the depths of their vitamins and minerals. The resulting broth, be it clear or cloudy, should be put in a cold place to chill for several hours. It is ready to work on again when the layer of fat on the top is solid and opaque.

Using a wooden spoon, carefully remove the hardened fat from the top of your broth. Depending on your preference, it can be saved in the fridge or freezer for use in other recipes (it's great in place of lard), rendered for use in pie crusts, soaps (it replaces the palm or coconut oil!) or other items, or tossed. There should be very little fat left in the broth when you are done (a bit is just fine).

Re-heat your broth, stir well, and then ladle into hot, sterile jars and process according to the directions for your pressure canner. Generally speaking, you'll want to process it at 15 pounds of pressure for 20 minutes for pints and 25 minutes for quarts. Always check to see if there is a different pressure for your area (if you're above or below sea level, pressure and timing can change dramatically!). Never "wing it" when it comes to pressure canning.

Another option for those little bits of broth that don't quite fill the last jar, is to freeze them in an ice cube tray. Each ice cube tray holds about one tablespoon of liquid. Once your broth cubes are frozen, store in a ziploc style baggie, and pull out anytime you only need a couple of tablespoons of broth. This way, you don't waste an entire jar opening it for such a little bit!

Check back often for information on canning, preserving, general homesteading and more. If you have questions or comments, please write to me below. I love to answer questions! You can follow the blog via Network Blogs and Google Friend Connect (see the left hand column for the button). If you purchase items I have linked through Amazon or the ads on my site, I receive an affiliate portion of the sale. If you find the items are useful, please purchase from my site!
 
You may also be interested in:

Protein - it's good for you!
Creamy Potato Soup
Prepping 101
Hungarian Cabbage Rolls
Danger, Will Robinson!

1) Photo by TheKohser / Wikimedia Commons
2) Photo by Dennis Crowley / Wikimedia Commons
3) Photo by Claus Ableiter / Wikimedia Commons

Friday, November 16, 2012

Protein - it's good for you!

TVP - Textured Vegetable Protein

Prices are going up. The price of just about everything is going up, and will continue to go up. The price of meat, however, is going to move a lot faster than most other things. For those of us who are omnivores, that gets a bit scary. What do you eat when you can't afford to eat beef, chicken, turkey or pork?

Since the price of meat started going up about two years ago, we've been slowly cutting down on the amount of it that we eat. It used to be (and yes, you'll be shocked) that we would sit down as a family of three adults and two small children, and eat 2.5 lbs of meat easily along with a variety of vegetables and grains. This is no longer the case.

Generally speaking, I allot 2-2.5 lbs of meat for dinner now. That feeds four adults, one older teen, and two seven-year-olds, plus leftovers most nights. That's a much healthier ratio of meat to "other stuff" at our table.

TVP repackaged
Still, finding 2 lbs of meat that we can afford to purchase for our family is becoming more and more difficult. The cheapest of ground beef (that I'll buy, and I'm guaranteed is not pink slime or worse) is currently $2.99/lb. Chicken legs with backs can be found for $0.79/lb but I have to drive to get them. I can pick up whole chickens for $0.99/lb, which is what we seem to end up doing most times. Breasts are easily $3.99/lb. Beef is anywhere from $3.99 to $16.99/lb depending on the cut. Pork is in the middle, ranging from $4.99 to $8.99/lb. Turkey is usually a bit more expensive than chicken, except around Thanksgiving. Right now, we're getting turkey at $0.49/lb, and I'm going to be filling the freezer with as much as we can afford.

When I'm cooking something made with ground or finely cut meat, I often substitute half of the meat for TVP, or textured vegetable protein. TVP is a meat substitute that is made from defatted soy beans. It doesn't have any flavor to it, and will easily pick up the flavor of whatever you are cooking. It's a dehydrated product, and requires about five minutes of soaking in broth or water before cooking with it.

The best things about TVP are that it is inexpensive (under $3.00 a bag) and a little goes a long way. A 10oz bag of Bob's Red Mill TVP will last weeks worth of meals. I mix it up with water and then sauté it in a tiny bit of butter and bacon fat for flavor. Sometimes I'll rehydrate it in broth to give it flavor of its own. I discovered that TVP rehydrated in water and then cooked in fresh bacon fat until it's crispy tastes almost like bacon bits (certainly more so than the "artificial" bacon bits you get at the store!).

When I make meatloaf or meatballs or spaghetti sauce or chili, I now use half or 1/3 ground beef and the rest TVP. The family can't tell the difference, and they get just as much protein (and less bad fats) as they would if I used all meat. For those who are on a restricted fat diet, TVP can be a real help.

A scant quarter cup of TVP makes an amount that is about equivalent to a pound of ground meat in both bulk and amount of protein. Use it in place of any ground meat, or in conjunction with it. I find that if I mix in a little real meat with the TVP it makes the flavor perfect. It's dehydrated, so it's incredibly light and stores in a small space.

Stored in the OJ bottle
When I buy my TVP, it comes in a plastic bag with the label on it. I don't like keeping stuff in bags, because they can be chewed on by mice, popped open accidentally, and once they've been opened for use you can never quite get them closed tight enough. I re-package my TVP into vacuum sealed baggies or into hard plastic containers. It just so happened that this week when I was re-packing the TVP, I happened to have an empty, clean, dry orange juice bottle that is squarish. It took two full bags of TVP plus a bit (the remainder went into a jar by the stove which I dip into frequently). It was easy to pour in, easier to close, and I no longer have to be concerned about children or rodents.

Check back often for information on canning, preserving, general homesteading and more. If you have questions or comments, please write to me below. I love to answer questions! You can follow the blog via Network Blogs and Google Friend Connect (see the left hand column for the button). If you purchase items I have linked through Amazon or the ads on my site, I receive an affiliate portion of the sale. If you find the items are useful, please purchase from my site!
 
You may also be interested in:

Creamy Potato Soup
Prepping 101
Hungarian Cabbage Rolls
Danger, Will Robinson!
Cooking without electricity

Tuesday, November 13, 2012

Troglodite Services: Risk Assessment

Troglodite Services: Risk Assessment: What is risk assessment? Risk assessment is the process of determining the relative probability and consequence of taking an action in...

Chris goes over the importance of risk assessment and how it is used. Really great article, very in-depth.

Monday, November 12, 2012

Homestead Barn Hop #87

I've had a bit of a hiatus from the various linkies of late. With the twins' birthday, Halloween, 2 weddings, and a bunch of other stuff, I just didn't make time for it. But today I'm glad I went to look at the Homestead Barn Hop, because there's a dozen interesting links over at the Hop! I posted up my potato soup recipe and the prepping 101 commentary I did about the kids. Do you have things to share over at the Hop? Go peek at what they're up to! You can also enter your own links here.

Saturday, November 10, 2012

Creamy Potato Soup

Broth
You know those nights, when you've planned out a complex, delicious dinner, and then your kid needs to be rushed to the clinic with major ear pain? Yeah, me too! The hubby has been working on the sauce for lasagna since yesterday, and the whole house smells incredible. Then last night, just as he was about to start making the noodles and put it all together, sis called to explain the girl child was experiencing some ear pain and liquid draining. I got an appointment for her, and they went rushing off while I was left holding the dinner bag.

My secret ingredient
What do you do when you're trying to eat well and healthily when your planned meal doesn't happen? I turn to soups, because they can be done very quickly if you have some pre-made broth or organic bouillon cubes. With an hour and a bit of patience, you can turn out a gourmet soup that will impress family and friends and that takes very little effort. Most soups start with a basic stock, and some combination of onion, carrot, celery and potato. If you keep those five ingredients on hand, you'll have a quick supper whenever you need it.

Browning sausage
Since I was stuck at home with no vehicle, no money to pick something up, and no meat defrosted, I was limited in my choices. I decided to make some potato soup, but with a bit of flair to it just because I could. The result was a creamy, delicious soup that was thick enough to stand a spoon up in. We served it with grilled cheese sandwiches, although a crusty french bread or some warm biscuits would have worked as well.

Ingredients:
  • 10 cups of broth (or 10 cups of water and bouillon cubes/powder)
  • 8 potatoes, in small cubes
  • 1 carrot, finely diced
  • 1 stalk of celery, finely diced
  • 1 onion, finely diced
  • 3 cloves of garlic
  • 1 lb ground sausage
  • 1/2 to 2 cups dehydrated flaked potatoes
  • 1/2 cup of half-and-half, cream, or milk
  • 1/4 cup minced fresh parsley
Dicing the potatoes
In a soup pot, add your broth or water and bouillon, and bring to a boil. The potatoes should be fairly small, about the size of dice, and you can leave the skin on as I did, or peel them, depending on your taste. Add in your potatoes and allow them to cook for about ten minutes while you prepare the other vegetables. Dice up your onion, carrot and celery finely, so that the pieces are about the size of a pencil eraser. Add the carrot and celery to the potatoes in the pot, and continue cooking until the potatoes are softened.

Garlic in the mincer
In a separate pan, brown your ground sausage. I used a Jimmy Dean style (but organic and local) sausage, but you could also use any other ground sausage you happen to like. Alternatively, you might try cooked pork loin, in small pieces. Once the meat is cooked, use a slotted spoon to set it aside in a bowl. In the remaining grease, cook up your onions until they are soft and beginning to become clear. Add these to the pot as well.

Vegetables
When the potatoes have become quite soft, use a potato masher to squish them up. The idea is to make the soup a bit thicker (it will be fairly brothy at this point), and not to completely mash the potatoes. Our family prefers a potato soup with chunky bits in it, but if you like a smooth soup, you may want to run it through your food processor or blender before moving on.

Sausage and parsley added
Once your potatoes are the way you want them, add in a half cup of potato flakes at a time until the soup is the right consistency for you. I added about 1.5 cups of potato flakes, but we do like a very thick soup. Let it simmer for about five minutes, then add the cream and the parsley, and stir well. Continue to stir and simmer for another five minutes, then serve hot, right out of the pot.

All ready to serve
This soup is incredibly filling. The flavor is quite nice! I didn't have any broth on hand, so I cheated with some Goya bouillon that we'd picked up on sale. It does have MSG in it, but that's it's only objectionable ingredient (for us... your mileage may vary). It has a delicate flavor that really started us off right, without being too salty or thick. I like a light broth to start any soup with, and often can my own chicken broth from left-over carcasses.

Because of the bouillon, the soup had a slightly pinkish tinge to it (the bouillon was tomato and chicken flavor, though you cannot taste the tomato at all) which made it quite pretty to look at. The tiny bits of vegetable swirled around in the creamy base, and the chunks of potato and skin gave it a good body. The sausage I used is a real favorite in our house, and I found it was the perfect foil for the slightly starchy potato base.

What is your favorite go-to meal for when you're in a rush? Do you have any secret ingredients that you keep on hand?

Check back often for information on canning, preserving, general homesteading and more. If you have questions or comments, please write to me below. I love to answer questions! You can follow the blog via Network Blogs and Google Friend Connect (see the left hand column for the button). If you purchase items I have linked through Amazon or the ads on my site, I receive an affiliate portion of the sale. If you find the items are useful, please purchase from my site!
 
You may also be interested in:

Prepping 101
Hungarian Cabbage Rolls
Danger, Will Robinson!
Cooking without electricity
Making dilled green tomatoes

Wednesday, November 7, 2012

Prepping 101

Learning new skills
Yesterday, the kids were off school. In our area of New England, they get the day off on Election day. So do most teachers. This means that we were all at home yesterday, enjoying some well-deserved time together. We took down a couple of trees, bucked them, and brought them over for splitting. We loaded up wood for the house (there's our first winter storm on the way), and brought much of it inside. We had delicious food for each of our meals, and Halloween candy (and popcorn) for snacks. Voting took almost no time at all, and was a pleasant experience. All in all, it was a pretty good day. 

We also watched a movie together. We decided to watch The Day After Tomorrow with Dennis Quaid. I chose this movie because I wanted to see what the kids would think of the choices made by the various people in the story. We didn't watch the movie all the way through, but instead stopped at several points throughout, having discussions and answering the children's questions.

PLEASE NOTE: POSSIBLE SPOILERS AHEAD!

Our kids just turned seven last week. They're in first grade. They've grown up in a fairly middle class family with an interest in sustainable living, and with many loving and caring adults (and younger people) around them. They're also incredibly smart, and they've grown up being rewarded for thinking "outside the box." I wanted to see how they'd stack up against others in a survival situation, at least via talking points.

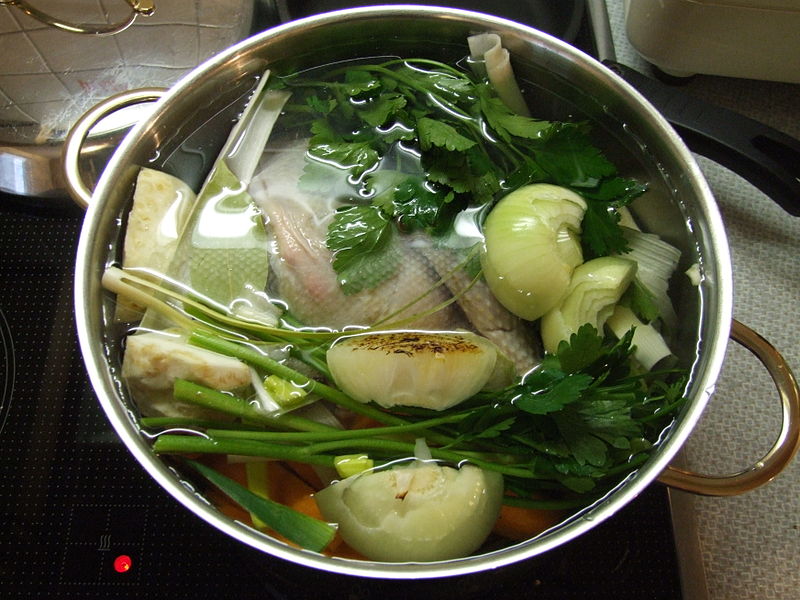
Cooking stew at the campsite
The first thing we discussed was "global warming," a theme throughout the movie. We talked about climate change versus global warming, and why we work with the former and not the latter in our family. We talked a bit about Hurricane (tropical storm, tropical depression) Sandy, and how scientists have said that the warmth of the water on the coast helped make the storm much larger than it might otherwise have been. We also explained that the movie was completely fictional, but that climate change is real and that Sandy and her storm surges and flooding was quite real as well.

I think that part of the lesson was over their heads a bit. Though they asked some good questions, I suspect much of what was said is going to be "in one ear and out the other" as they say. I don't blame them, considering that's also true for most adults.

When we began to see the storms rising in the movie, our girl flipped out. There were tourists taking photographs of the developing funnel and she was literally screaming, "That's a tornado, you dummies, get out of there!" We had to pause because she was so upset that people could be so stupid. Our boy, being autistic, was more constrained on the issue, but he also seemed upset that people would just stand there as a giant destructive thing started coming for them.

We talked, also, about whether it was safe to be in a car or house during a hurricane or other natural disaster. We asked the kids what they'd do if they were on their own for some reason, with no grown ups around, and saw (or heard) that a storm was on the way. Their answers were gratifying. Despite never being taught directly, they had picked up some pretty decent strategies.

Her first sewing project
The girl child immediately said that in some storms it was okay to be in a car, but that she'd rather be in the house. Both children said they'd head for the basement if they knew a hurricane or tornado was on the way, and that they'd go to the very back where the heavy brick walls are, and crouch there. They said they'd take flashlights, too. Since that was the most correct answer, I was extremely pleased.

Later in the movie, when the snow started falling, we paused again. Once we all had popcorn and drinks, we asked the children what the most important thing is in a winter storm. There was a bit of guidance involved, but they eventually got to the correct answer: shelter.

They listened to the climatologist explain the (pseudo)science behind the storm cells ravaging North America, and when some of the people decided to go out and try to walk in the snow (presumably to escape to somewhere warmer, although I've no idea where they thought they'd go on foot) they both gasped. We were told emphatically that it was stupid to leave perfectly good shelter with lots of burnable things in it (the characters were in a library). Yay, team kids!

Our boy, ready for anything
When we were all done with the movie, we sat together as a family and had a long discussion about what the most important things are in an emergency, and what that means to them personally. They've heard us talk about the Rule of Threes numerous times, and got to see it put into action during our talk.

The Rule of Threes states you can live for:

  • three minutes without air
  • three hours without shelter
  • three days without water
  • three weeks without food
  • and three months without hope.
Major first aid is beyond our little ones,  but they have bandaids and such in their packs. Shelter is something we spent a lot of time on, because we wanted them to understand just what shelter is. Shelter is your car or house, or a tent, but it's also a bivy sack, a tarp held up with paracord, a log cabin, a lean-to made out of branches, warm clothing (both inner and outer), and much more. We covered everything from having extra socks to using space blankets. Since both kids have had the experience of sleeping in their daddy's bivy sack (and the boy did so in the middle of a rain storm where he was basically in a huge puddle in the bottom of the tent, and still quite warm and dry), they were able to use that experience to expand on the other things.

Water was the most interesting topic that we went over, in my opinion. Both kids came up with fantastic outside-the-box ideas for where to find water. The boy pointed out that the ice in the fridge and freezer can be melted and used for drinking water, something I admitted to him that I hadn't even thought of myself! Then our little princess, who wears pink and doesn't like to get dirty, sported a disgusted face and started to giggle. With a bit of coaxing (and assurances she wouldn't get in trouble), she noted that the toilet is full of water. Bingo! I could have hugged them both into little piles of love at that moment.

Canned summer harvest
Food they know way too much about, having been involved in the canning and drying and otherwise storing of our harvest and purchases. Hope, too, they're fine with. They know that books are precious friends, that board games and card games are a ton of fun, and that little projects like cross stitch and quilting and the like are also a lot of fun to engage in.

Our children passed the Prepping 101 test with flying colors. They understand the mentality of putting away food for lean times. They are very aware that home grown food tastes better. They know that we care for them, but we also expect them to care for themselves and be responsible children. They might give a bit of lip while sitting around the house (yeah, okay, sometimes a LOT of lip) but in an emergency they're pretty darn good.

In the process of our family day together, our kids learned valuable lessons. They taught us, too, that they're hearing a lot more of our talk than we thought. We found out that they not only have some pretty fantastic ideas, but that they're not bound by the standard thoughts held by most people (how many people do you know that would think to drink the water out of the back of the toilet in an emergency?).

I hope they never have to deal with an emergency like Sandy or Katrina. I hope they live their whole lives with nothing more upsetting than a lost election, and the usual sibling rivalry. I also am comfortable knowing that they are aware of what needs to be done if we're not that lucky.

What things do you teach your children about? Do they know what to do in an emergency? Are you willing to teach them some elements of preparing for emergencies of various kinds? Why or why not?

Dealing with power outages more efficiently

Dealing with power outages more efficiently

The article is a decent one, talking about how to deal with crisis management for emergency personnel trying to restore power after a problem.

However...

I am aghast that their huge example was a 90 minute power outage in Germany. I am shocked that they talk about how much money is lost during a power outage. There are many considerations, I agree, but ... frankly, that isn't one of the big ones for me, at least.

I think I shall put on my Queen of the Universe hat and direct things As They Should Be.

First, it's winter. If you live in a place where snow comes, be prepared for it. That means buying a snow shovel before the snow hits, having salt or sand or ashes on hand to melt ice in walking paths, and fuel for any equipment you might own and wish to operate.

Second, there are emergencies at all times of the year, and each season presents its own dangers and risks. Right now, coming into winter, we need to consider a number of things, but first and foremost is heat. If you live in a house, have a fireplace that can function if you have no other choice. Better yet, have a wood stove (can't afford to buy a nice new one? check craigslist for cheap or free alternatives!) that you can use to supplement your (very expensive) oil or electric heat, thereby reducing your costs. Don't heat with your stove, and don't bring a big generator inside your shelter, because it puts off carbon dioxide and that can kill you faster than the cold. Shelter (which includes heat) is vastly important - don't leave your home (or car, if you're stuck at the side of the road) during a snowstorm.

Third, think water. If you're snowed in, you have TONS of water all around you, and as long as you have a means to melt it (see 'heat' above) you will be fine. It's best to consider a gallon per person per day for drinking and washing, although you can get along with less if necessary, for a short while. We keep "cubes" of water in the back pantry. They're just water from the tap which we circulate when necessary (ie a few days before we know something's coming). They're the difference between scrounging and being comfortable, though.

Fourth, it's winter. Be prepared for getting snowed in (or iced in or rained in, depending on your location). If you wake up and find your car buried and your work for the day canceled, you should be able to sigh happily and snuggle back under warm blankets and know that there's enough food in your pantry to last you for a week or two. If you think that's out of line or too expensive, consider the people who are currently living on FEMA handouts in NYC and NJ. Food prep might not have helped those who lost their houses (bless them all), but for those who had "only" (and I apologize for the term) damage but not loss of home, and those who have perfectly fine houses but just have no power, that two week food supply can carry you through most natural emergencies. If nothing else, it can supplement what FEMA or local disaster people give you, meaning the difference between bare survival and hunkering down 'til the emergency is over.

Fifth, but by no means last, have light and entertainment available to you that is not dependent upon the power grid. Break out those dusty board games and a deck of cards. Teach your kids to play cribbage. Read books together in front of the fire. Pull out the workbooks from your kids' school and go over what they'd be doing if they were there. Have fun together, even if the going is tough. If your focus is on the positive, that's where you'll head. Likewise if you focus on the negative.