Tuesday, January 31, 2012

Thrive: Make Your Own Girls Tights!

Thrive: Make Your Own Girls Tights!:

'via Blog this'

Okay, how many of you have children that destroy the heels or feet or knees of their tights before they've outgrown them? I know our kid does that! Here's an amazing tutorial on how to turn cheap adult socks into wonderful tights for girls!

Monday, January 30, 2012

It's About Time: Inside the Beautiful Glass Cloche

It's About Time: Inside the Beautiful Glass Cloche:

'via Blog this'

This is an older article, from two years ago, but has some stunning pictures of glass cloches. I find myself wondering if I could do this with plastic soda bottles that have had the bottoms cut off. My garden isn't huge, but I have no way to create a greenhouse for my early plantings. This would provide a greenhouse effect without the expense (of both cash and space) of an actual glass greenhouse. I'd love to find actual glass cloches but I have never seen any in the stores or at the tag sales locally. I will have to find a way of making my own!

Thursday, January 26, 2012

Seed Catalogs

Some of last year's seed catalogs

January... a cold, icy month that is usually filled with dark, wetly snowy days and nights punctuated with extra quilts. Still, it has two things going for it: my birthday (today!), and the arrival of the annual seed catalogs.

I love going through the catalogs, I admit it. I will soak in hot baths (so hot I look as red as those tomatoes up there!) and pore over the pages, some in color and some in black and white. By my birthday (did I mention that was today?), I have the first draft list of things to go in the garden.

Of course, if I were to go by those first drafts, I'd have to purchase about 25 acres and either a lot of horses and/or mules, or a rather big tractor. And hire some young people to do the work. That first draft is my dream, and I always take at least half of it off my final list. This year, I had to pare it down to a tiny amount, because we no longer have a whole acre for garden (our entire property - which contains circular driveway, garage, 2800+sq.ft. house, and flower garden - is just shy of an acre!). Instead, I am working with an area that is basically 25'x25' in size, and I'm working in raised beds (yet to be built) that are three feet wide and ten feet long each. I'll be using a square foot gardening style, although I'm not entirely adhering to it.

Garden 2012
The major winners this year were tomatoes, cucumbers, and bush beans. These are the three vegetables we decided we could not live without. The fact that we had to purchase canned tomatoes this winter really took its toll on me. I have jars and bands, and only need to pick up the appropriate sized lids and rubbers for them in order to be ready to can this summer's harvest of tomatoes.

The main garden will consist of six raised beds, each 10' long by 3' wide. There will be 5' of space between the beds, allowing us to take the lawn mower through. Some of the beds (notably the back left-most ones) may not get planted, but they will at least get built this year.

Where the raised beds go.
Starting at the front three boxes, the left-most one will contain the tomatoes and beans. I have slated space for three cherry tomato plants, and ten each of paste and meat tomatoes. The remaining 9 square feet are going into a solid line of bush beans, probably Providers, as I've had much success with them in the past. In the middle front box, we'll have shell and snap peas, some beets and cabbage (in the middle as I won't have to get at them until later in the year), and spinach and lettuce. I also have space planned for three zucchini plants and three Delicata squash vines. The right-hand raised bed will contain a whole row of cucumbers (Marketmore, of course, and I found open germinated ones for this year!!), and then acorn squash, carrots, sweet peppers, bunching (green) onions, and some stevia plants.

The back three raised beds are dedicated ones. The left-most will be for a grain of some kind, most likely spelt but perhaps a summer hard wheat. If we feel overwhelmed by the rest of the garden, this box will remain fallow or will have clover planted in it, or might even get the package of wild flowers put into it for cutting. The middle one is for corn, of which I hope to plant two (very different) varieties. We'll see, though. The right raised bed is for potatoes, both regular ones and sweet potatoes. We'll be planting red potatoes this year, as I've found they're highest in fiber and other good things. I might plant an edge of spinach and loose leaf lettuce along each side of the raised bed box, partly because we eat a lot of salad, and partly because it'll look nice. Radishes will also line things here, and will be used as markers elsewhere in the garden.

The lone bed goes over there.
Then, off to the right there will be a lone bed that is 8'x3', and that is my herb bed. I was going to do a spiral but I decided to try the square foot routine for my herbs this year, too. I'm planting Genovese basil, a hearty dill, cilantro, parsley, oregano, and regular chives. That should provide us with most of the herbs we use on a regular basis. We actually use a ton of basil because I like to make pesto from scratch, and you'd be surprised just how much of those leaves you can fit into a two cup measuring cup! The dill is for pickling and for drying (we like dill on everything from chicken and salmon, to put into a delicious sour cream based dip). Parsley and oregano are just staples, and the chives are because I need something oniony to put into the cupboard this year.

Yes, that's a lot of stuff. However, I didn't get in my onions, garlic, patty pan squash, broccoli, cauliflower, or kale. There are unfortunately no plans for turnips, eggplant, or watermelons either. Many of my favorites were left off the list because of space issues, or because we didn't think that we could handle the larger garden on our own. This is, after all, our first year on this homestead. Breaking ground with nothing but a backhoe and a hand-held hoe is probably going to be a lot of work! Hey, at least we have the backhoe, right?

The girl's garden plan.
Beyond the fire pit in the above picture, you can see the childrens' playground (well, part of it). In front of the bush there, a smaller raised bed is going: a 7'x3' bed for the girl twin. She's six years old, going on 25, and she pretty much demanded her own garden bed (this is separate from the flower bed, mind you). She may be a girly-girl, but she's also a green thumb and a farmer at heart. She has four sunflowers, three cherry tomatoes, a melon, a pumpkin, a broccoli, some carrots, some basil and lettuce, dill and garlic chives and oregano, two green peppers, some green beans (bush), a cucumber and a snap pea plant, and a peanut. Those were her choices, having gone seriously through all the seed catalogs and thought about what she likes to eat and "play with" in the garden.

Now that all the fun stuff is done, it's time to figure out when to plant all these things! Some will get started inside, likely in March (tomatoes, for instance), and others will be sown directly into the soil (carrots and beets, spinach and zucchini). I need to know when each has to be planted, and how, so I can put it on our calendar (thank you Google Calendar synched with my Android phone). I'll get an email the day I'm supposed to plant things, so I don't forget! After I have all those dates down pat, I need to make sure I order all the seeds in time for them to be here.

I also have to pull out the seeds I stored last year, either that I got from friends or that I had left over and that were good to sit for another year. They have to be tested to see if they still germinate, and if anything special needs to be done to them, I need to do it.

The world is fine... if cold. We're still in the planning stages. In fact, we're still in the "cutting wood to keep us from freezing" stage! Look for a post on wood cutting soon, from the hubby!

Monday, January 23, 2012

Minestrone... sort of.

I don't have images today, because I did not think that a simple minestrone soup (and not even a classic one, but a manipulated to be healthy version) would need to be documented. I admit, I was wrong. This was so good, and so easy, that it bears posting!

Ingredients:
- 1 lb ground turkey (or beef, but that defeats the "low cal" of it)
- 1 onion, roughly chopped
- 2 cloves garlic, diced or minced
- several cups of broth (see below)
- spices to taste (salt, pepper, onion powder)
- 1 can stewed tomatoes
- 1 can diced tomatoes
- 1 carrot, coined
- 1 potato, diced
- 1 can garbanzo beans (chick peas), well rinsed
- 1 can "other" beans (see below)
- 1/2 cup pasta (orzo works well, macaroni is traditional), uncooked

Method:
In your soup pot. brown your ground turkey. If necessary, drain it. With very low fat turkey it may not be necessary. Add the onion and stir until onion begins to soften slightly. Add garlic, tomatoes, spices, and broth to cover (depending on how "soup like" you want it to be, you may want more or less - I used about 8 cups of liquid, and I used my own home-made turkey broth). Cook for an hour, stirring frequently.

You want to have the garbanzo beans because they add protein (and in fact the soup would be almost as good without the turkey, but I like the flavor). The other bean can be anything: kidney, "little white," lima, chili, etc. If you are making the beans from dry, you want to end up with about a cup of finished (soaked) beans, but I prefer to make this from canned just because it makes it fast and easy. Be sure to really rinse out beans from a can, though, because otherwise they are slimy and grotesque and no one will eat them (okay someone might but I sure won't!). Let it cook another hour, at a low simmer.

Add your carrot and potato, diced into fairly small pieces. Cook until the potato is soft and edible, and then add your pasta. I used orzo just because I had a bunch of it sitting on the counter. I might also use my spetzle (that was what I was going to do before I saw the half empty box beckoning). Macaroni would work, as well as ziti, spirals, or anything else. Continue to cook (adding liquid if necessary) until the pasta is done.

Serve with crusty bread and big glasses of water!

Thursday, January 19, 2012

Making Bread

After several requests for recipe, I am putting my "learning recipe" up here. It is from "Bread Alone" by Daniel Leader and Judith Blahnik.

Heating pad / rack.
The authors go on and on about weighing instead of measuring, taking the temperature of your bread every 2 minutes, and basically fussing over it as if it's a newborn. I personally think that, beyond the first or second time (when, IF you follow EXACTLY you will get a perfect loaf), don't bother with it. This is how I did the recipe on Tuesday.

First, make the poolish, or sponge, whatever you want to call it. In a medium bowl, pour 1/2 cup of water (I used slightly warmer than my skin, but room temp is fine; don't use cold) and sprinkle 1/2 teaspoon of yeast over it. Stir gently with a wooden spoon to just wet it, then wait one minute. Stir with the wooden spoon again until all the yeast is dissolved. This takes a few minutes - I use the back of my spoon to squish any bubbles of yeast sticking together. I may be OCD about it, but my bread turns out nice...

Gluten on back of spoon.
Add 3/4 cup of flour (the book says 20% bran wheat, but I have used many high-gluten flours as well as the Better for Bread this time) and stir until it is the consistency of a thick batter. Again, it takes a while. Once it's stirred, continue going for about 100 more strokes, or until the strands of gluten come off the spoon when you press its back against the side of the bowl (see picture). Scrape down the sides of the bowl with a rubber spatula, cover with a damp towel or plastic wrap (I use plastic wrap because I have a very cold kitchen) and put in a relatively warm place (it should be between 74F and 80F). Because the average kitchen temperature in the morning (when I was doing this) is about 61F, I set my heating pad under a cooling rack (not touching) and put it on low, then sat the bowl on top of the rack and put a huge aluminum bowl over the whole affair to keep the heat in. It was probably closer to 82F in there, but I didn't measure and I didn't sweat it.

Bubbly poolish with water added.
This poolish has to sit there until it is bubbly and has increased in volume. I was in a hurry and only let mine sit 2 hours, but if you can put it in your oven with a light bulb on overnight, that works best. It's ready when it's got a bubbly texture, is puffy, and smells of yummy yeasties. Beyond that it's difficult to describe. You'll know it when you see it (groan... sorry).

The next step is to mix and knead the complete dough. You'll want at least 7 cups of flour reserved for this process, though you may not use all of it. Scrape the poolish into a large bowl (that metal one I used to cover it earlier worked well for me) and then add 2-1/2 cups of tepid water (again, just barely warmer than skin) and 1/2 teaspoon of dry yeast. Break up the poolish with your wooden spoon and keep stirring gently until it's loosened up and it foams a bit. Add 1 tablespoon of fine sea salt (really here, if you're going to purchase anything special, make it the salt... believe me when I say iodized salt does nothing for this bread, though it doesn't wreck it either). Add the dough a half cup at a time and mix well in between, adding just enough to make it a very thick mass that is difficult to stir. Usually I stir until it just starts clinging to the spoon and whomping around the sides, at which point I peel all the dough off the spoon and start "stirring" with my hand. It's almost-but-not-quite kneading. Work the flour in until you have a dough stiff enough (ie still incredibly sticky but not pourable like a liquid) to turn out onto a floured piece of countertop.

Kneading the dough.
This is the therapeutic part. Knead the dough and keep adding flour until it's softer, sort of like play dough in consistency though not as solid. Tacky is okay, but WET is not. Set a timer at this point, and knead that sucker for a full 17 minutes.

Yes, 17 minutes. No, I'm not kidding, and don't give me that look. You want this bread to be good. Believe me when I say this step is the make-or-break for this recipe. Even if you weren't quite right on other things, if you knead the full 17 minutes you're almost guaranteed a full success.

The dough will go through stages. It'll seem sticky one moment, smooth and silky the next. Somewhere between the 12 and 17 minute mark, it will become very elastic, just barely tacky, and soft sort of like a baby's butt. It's better to have the dough be a bit moist than too dry, so don't put too much flour in.

You will know the dough is ready if you stick a finger into it and pull it out, and the dough springs most or all of the way back out. Also if you shape it into a ball, it should hold its shape and not go all saggy on you. If you're just not sure, knead more. You cannot over-knead this if you are doing it by hand.

Before....
Shape the dough into a ball and let it rest on a lightly floured surface. Using olive oil or butter, coat the inside of a large bowl (the big one you had before would be fine, or a clay one can be nice). It should be slick but not drowning or pooling. Place the dough in the bowl and get it oily, then turn it over so the other side gets coated as well. Set it into your warm place, about 78F if you can. Cover with damp towel or saran wrap and put back in the stove or whatever non drafty place you have handy. Let it rise until it is doubled in volume. I find taking a before and after picture helps a lot here (thank you Droid Citrus!). I let mine rise about 35 or 45 minutes.

Now you deflate the dough by punching it good and hard right in the center. Pull the sides up to form it into a ball again, put it back in the bowl, and cover it yet again to rise. It needs to sit in that warm, draft free place for another 30 minutes.

... and after!
It should rise almost to doubling. Deflate it again with a punch, and put the dough onto your floured work surface again. Knead briefly (2 minutes or so) then cut in half. Flatten each piece with the heel of your hand, or use a rolling pin to roll it out. This lets out some of the yeast gas, and invigorates the yeast to work harder. They like it rough *grin*.

Shape the dough into a tight ball for round loaves, or into torpedoes (big in the middle, less so at the ends), or roll it out flat to an inch or so thick, then roll up into a loaf, seal the seam by pinching the dough together firmly, and put into bread pans well sprayed or oiled.

The best way to do this part is to make your round loaf, then take a dish towel and literally rub a cup or so worth of flour into it. Get it really in there (and never use it for anything else, by the way... it'll store natural yeast for you!), and then set your round loaf onto it. Cover with the big bowl or with plastic wrap, or with a warm damp cloth and let sit for 1-1/2 to 2 hours, until increased in volume about 1-1/2 times. Again, pictures are worth a thousand words (or bad memories).

I braided one loaf.
Preheat your oven to 450F. If you have a pizza/bread stone in it, you want it to sit at 450F for at least 15 minutes before you think about putting loaves in there, as the stone needs to be fully warmed. Make sure your rack is dead center in your oven, because if it's too low you'll burn the bottom, and too high will burn the top.

Up-end the dough gently onto your cooking surface, and with an VERY sharp knife give a single long cut to the top, or several smaller ones (you can make patterns, yes). Once the loaves are in the oven, take a metal bowl and fill it with cold tap water. Toss about half off it into the bottom of your oven (not near your light bulb or it could break!). Close the oven door quickly and time three minutes. Again, dump some water in the bottom of the oven, but this time leave the bowl in the oven, below your loaves. Close the door as quick as possible to keep the steam in. Bake for 20 minutes at 450F, then check. Mine were done at that point, but depending on your loaf size and shape, and way of cooking (I was on a pizza stone), you may need to drop the heat to 400F and cook another 15 to 20 minutes. The loaves should be a rich caramel color, with a firm crust. To test for doneness, hold the loaf in one hand and tap the bottom. If it sounds hollow, then it's done. If not, try another 5 mins or so and test again.

Cooling...
Now the hardest part. Those loaves need to be put onto cooling racks (not towels or counter tops that will let them get moist) and allowed to cool for a full 20 minutes before you cut into them. They will still be warm after 20 minutes, but bread continues to cook for that last 20 minutes so you can't forget it. It is part of the recipe!

Slice, slather with butter, devour!

Tuesday, January 17, 2012

How to Field Dress a Squirrel | The Art of Manliness

How to Field Dress a Squirrel | The Art of Manliness:

'via Blog this'

I highly recommend this lovely article. There are many pictures, though, so if dead skinned squirrel makes you squirrely, don't look! It's got practical, useful information on how to dress and prepare a squirrel for eating. With prices being what they are, this is getting more and more interesting to me. Not to mention, the squirrels out here are the size of large cats!

Friday, January 13, 2012

Italian Focaccia

As some of you may know, I have been trying to learn how to bake yeast breads. I'm fine with soda breads and cakes, but when it comes to yeast, I've had a miserable decade of it. Now that we're in the new house and I have the majority of things unpacked and sorted, I have decided to return to my bready studies, and have applied myself to learning this skill. Since it is a skill mastered by both other adult members of my household (neither of whom have the time to bake in the "old fashioned" way lately), I have plenty of places to turn for immediate advice when things don't go well.

Today's experiment was a second try at focaccia bread, which is a flat Italian bread topped with olive oil and spices (and in this case, onions). The original recipe is out of the Frugal Gourmet's first book. I tried the recipe, untampered with, last night. It was alright, but we all found that it was not quite right. I discovered that "9x13 shallow pan" does NOT mean a ceramic oval pan of somewhat close size, and results in a doughy interior rather than a nice, proper bread crumb. None of us liked the tomato and chopped onion/garlic topping, it being TOO oniony (and this is a family that loves onions). So this is my modified experiment.

Ingredients:
2 packages dry yeast, dissolved in 1 cup lukewarm (tepid) water
3 cups unbleached flour (I used bread flour)
olive oil
1 teaspoon sugar
1 teaspoon salt
1/4 yellow onion, sliced into half moons
fresh pepper and Italian spices

Method:
The water should be just a little warmer than your skin temperature, and I took the time to warm the mixing bowl in the oven before putting in the water and yeast. Because our kitchen is very cold by baking standards (it's usually below 65F), I wanted my equipment to make things comfortable for my yeast! I put the water and yeast into my big KitchenAid mixing bowl, then added 1.5 cups of the flour, 1/4 cup of very good olive oil, and the sugar and salt. I mixed it in the MixMaster for about 3 to 4 minutes, something that was hard for me.

The directions state to mix "until smooth" but that's not very descriptive to someone who isn't a natural or experienced baker. Last night, sis told me to let it go a lot longer than my wont, and so I did so this afternoon as well. The first few minutes it looks a little grainy, but after a while it starts to get very liquid looking, almost like a pudding, with lots of gluten strands springing off the sides as the beater goes around. When it reaches this point, where it's quite smooth and soft looking, take your bowl out of the mixer and push the equipment away. You're doing the rest by hand!

Pull the rest of the dough off the beater, and then add in the rest of the flour. Blend it by hand, something I assure you will be sticky, messy, and perhaps uncomfortable. It does get better, I promise. You want to squish the dough and the flour together, until it becomes less soupy and more doughy. This process takes about five minutes, perhaps less time if you're more experienced. Take the time to scrape the sides of the bowl several times during the process, getting all the flour worked in. You can see in the image that the dough gets almost stringy, and is very sticky during this entire part. It will coat your fingers and stick to them. Once in a while you'll want to pull all that dough off and return it to the bowl, so it gets worked in with the rest of it.

Once the majority of the flour is worked in, slop the whole thing out onto a floured countertop (they call specifically for Formica in the cookbook). Again, as you can see, it's still sticky and messy and not as much like the nice, elastic bread dough as you might like. It's okay, really. Be patient and don't be afraid (I was terrified I'd done something wrong). Set a timer (or better yet have a friend do it for you) for five minutes, and then begin to knead the dough. You want to push down on it with the heal of your hand, and then do a quarter turn, fold it away from you, and press again.

Keep doing the kneading for the entire five minutes. You'll notice that the dough stops being sticky after about a minute, and then continues to change in consistency. It'll seem dry for a bit, then springy, then almost wet again, then it'll cycle through some variation of those. Don't be alarmed. Get into it; meditate on it. This is great exercise for your shoulders and arms, and is very therapeutic in a meditative way. I have to use a foot stool to get myself high enough to knead properly (when you push down with the heal of your hand, you should have straight arms). Don't be afraid to really put your back into it - lean into the dough, really press it hard. It'll tear a bit under your hands and that's fine. It'll stretch, turn, look funny, and then just about the time the timer beeps, you'll notice it changes. No, I can't tell you what it's like... it's just something that happens with dough when you've treated it correctly.

I made a ball out of the dough, achieved by sort of cupping it repeatedly with your hands while turning it. You'll note it is NOT sitting in the flour anymore. You want to let the dough rest now, and if you don't have Formica countertops, put down some saran wrap to let it sit on. Cover it with a large bowl (you can see mine in the picture there). You want the dough to rise for about one hour, or until it's doubled in size. You might find that a phone camera is handy at this point, because you can take a picture and then compare it later!

Now, if you have a cold kitchen (under 70F), you probably want to do something to keep the dough from getting too cold. See, we're letting the dough rise here, and that means the yeasties have to be warm and moist. Moist they get by being under the bowl, but if your kitchen is only 62F like mine, the yeast begins to slow down or stop, and no rise happens. I solved this with a neat little trick - a heating pad (the kind you use for sore muscles) set to low, on top of the bowl. It doesn't get hot enough to actually heat the bowl up, but it keeps the temperature underneath nice and even. It was a tiny bit warmer than the kitchen under there, and it rose beautifully!

As you can see, the ball doubled (or more!) in size in my hour. Don't forget to use a timer - this is not something that does well if forgotten. You want to make a fist and actually punch down your dough. It will deflate; don't panic, it's supposed to do that, and yes it makes funny farting noises, which is great if your toddler happens to be around. Knead out the dough for a couple of minutes (don't go much over 2 minutes, although it does feel awful good at this point, almost like a baby's powdered butt).

Using a rolling pin, roll out the dough until it is about 9" by 13" (roughly... don't bother with  measuring here!). As you roll, put your back into it again, as you're going to want to make all the big air bubbles pop. Again, toddlers and young children will appreciate this part, as it is kind of amusing to listen to. Sort of like a bready bubble wrap. I would guestimate that my dough ended up being about an inch thick when it reached its final shape and size, although perhaps a bit thinner than that. It still felt pretty soft and springy.

Put your rolled out dough onto a well greased baking pan or a floured pizza/oven stone. I love these pizza pans, with their zillion little holes in them. It allows air circulation and a beautiful crust formation. You want to let this rise again, "...until not quite doubled in bulk." I set it for 30 minutes, but then it sat for a longer time while I got the next part of the recipe done. I put the metal bowl over it again, with the heating pad hat, for the second rising. I would say it almost doubled, though I only eyeballed it.

After it has risen a second time, you want to poke it with a fork. Poke it all over. Make pretty patterns if you like, or be random like me. Enjoy yourself! I like this part, a lot. It will deflate a bit, though not a lot. While you're doing this start pre-heating your oven to 375%. You want your oven to be FULLY pre-heated before your bread goes in. The initial "blast of heat" invigorates your yeast and makes for a slightly puffier, more delicious bread. This is true of all kinds of bread, by the way, not just focaccia.

Next, drizzle some good quality olive oil over your bread. Use your hand or a food brush to lightly coat the entire top of the bread with the oil. Then you sprinkle it with the spices you want to use. I used pepper, and an Italian blend of herbs. I also used the halved onions, which I sort of spread randomly over the top. If you want to use the tomato paste, you put about three tablespoons worth of it on right after the olive oil. I preferred it without, and so didn't bother using any tomato on this loaf. Having seen focaccia in stores, I would guess you could also top it at this point with sliced olives, sliced tomato, or perhaps even a sprinkle of feta cheese or something similar. I wouldn't try cheddar or any other grated style cheese because the fat content when melted might make it too greasy.

Pop your focaccia into your pre-heated oven and let it stay there for about 25 minutes. I checked mine at the 25 minute mark and decided to let it sit for another 4 minutes. That took it from "lightly browned but still looking rather doughy" to "perfect." The onions got a tiny bit browned, too, which made it look like one of those beautiful artisan loaves you see in higher quality grocery stores, or at bakeries. I was very pleased with how this loaf turned out, especially after last night's rather 3/4 cooked results. The smell is heavenly, too. Our children have been clamoring after the bread since before it got out of the oven!

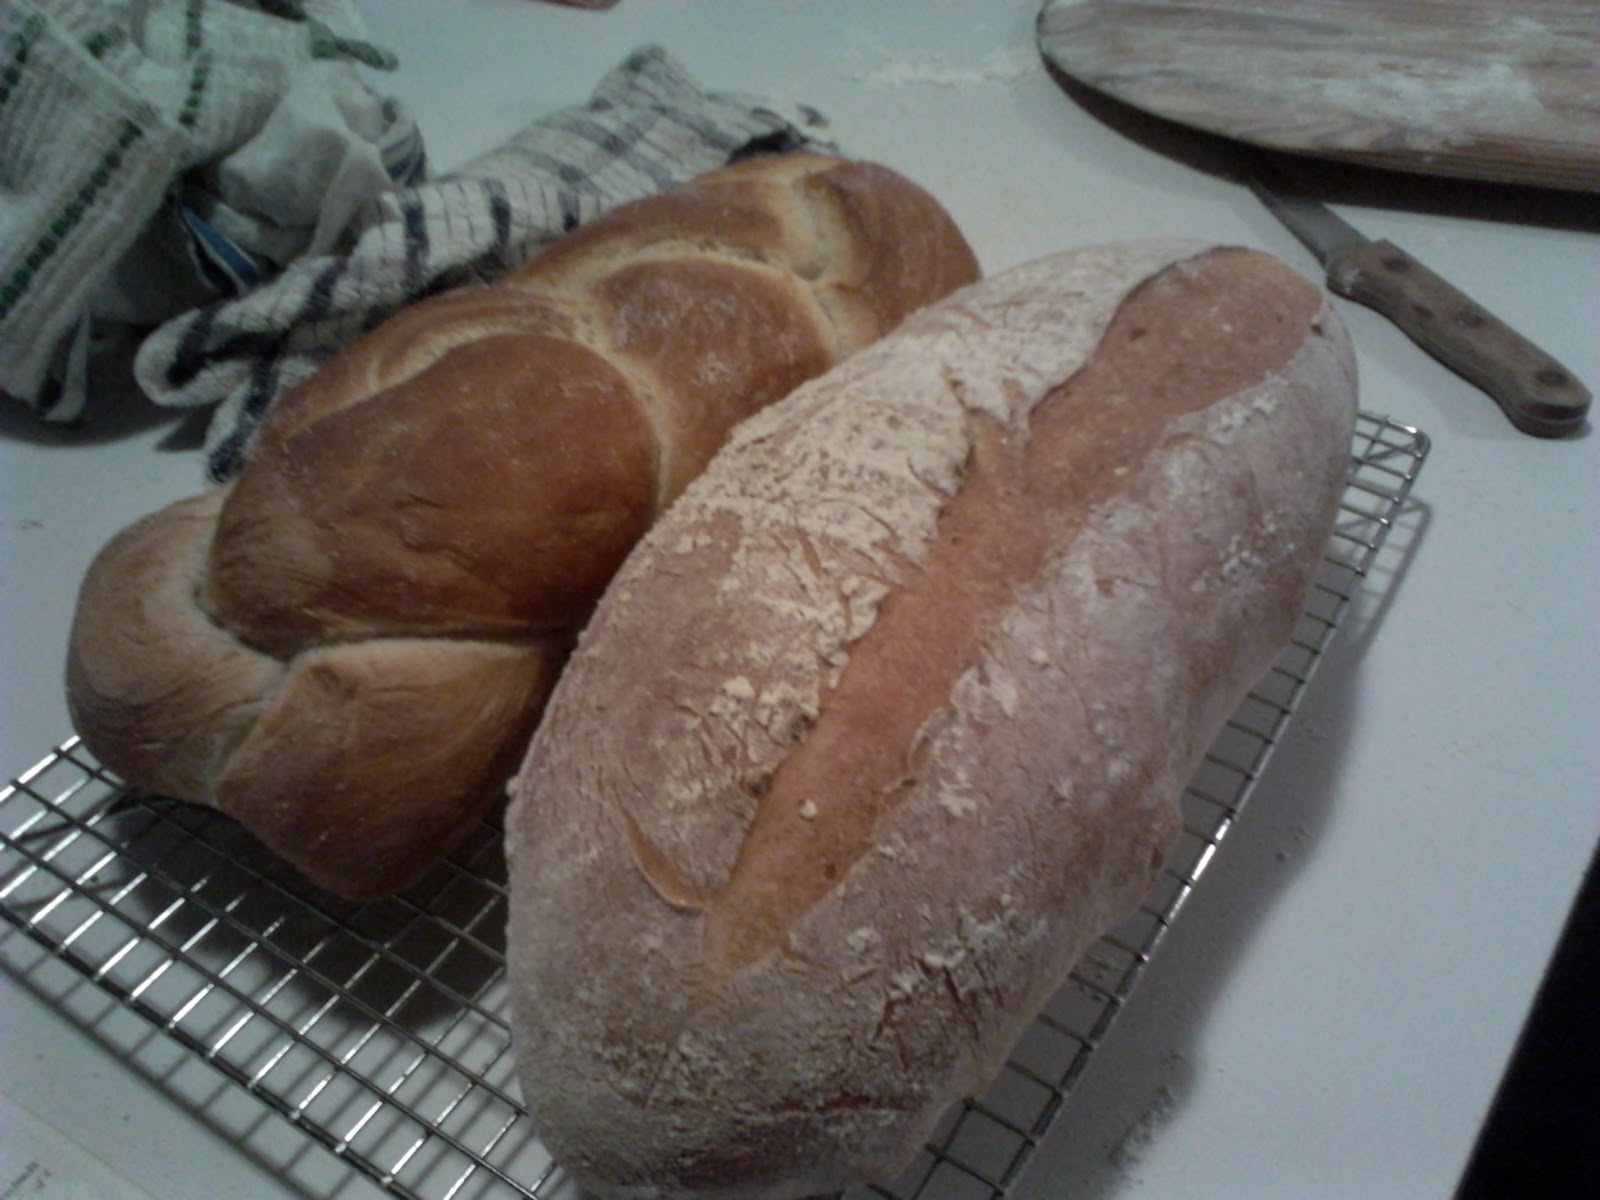
The finished Italian Focaccia loaf!

Wednesday, January 4, 2012

Winter Activities

There are lots of things to do during the winter that keep you occupied. Splitting wood for the fire, for instance, or shovelling snow (except we haven't gotten any!), or cooking. Now that the holiday rush is over, we've started to make some of our own food again rather than relying so heavily on store bought. One of the nice things that Gray has been making, is pasta! You can see the girl twin in the picture to the left, holding up a length of tomato linguine to show us. Gray made the dough, but she really enjoys helping with all stages of pasta creation. Her favorite part, though, is getting the pasta off the rollers and setting it off to dry.


Here's a little video of the girl and her dad, working away at spaghetti noodles. It's short (30 seconds) but cute. Please excuse the jerky camera; I used my cell phone and it isn't the greatest.

I will admit, we don't often have pasta stored away for future use. Gray makes it, and we immediately want to eat it, and end up boiling the water and cooking it right off. Even though he made a HUGE batch last night, we ended up eating all of it! One of these days, though...

Oh, and we found his ravioli plate! Sometime next week we'll be making stuffed raviolis... oh yum.