Tuesday, April 30, 2013

A blog give-away!

I follow Mary's Heirloom Seeds and just started following Back to the Basics today. They've paired up to do a seed give-away! If you're hankering for good quality seed but can't afford it, now's your chance. Enter the give-away and maybe you'll win a Baker's Dozen Combo Pack!

Good luck!

Monday, April 29, 2013

It doesn't have to be expensive

Miss T watering one of the raised beds
 Sometimes, the idea of getting started in gardening can be quite overwhelming. It's a lot more than just getting some seeds and tossing them into dirt, after all, and there's so much information available on the internet and in books that it's hard to know which way to turn for help. If you look to popular sites like Martha Stewart or Home Depot, you find a lot of great ideas with huge price tags.

Chives
It doesn't have to be expensive, though. If you look at the header picture there, you can see Miss T watering a raised bed. That bed is made by screwing together four pieces of plank wood that I found on the side of the road for free. The decking screws we used were "borrowed" from Gray's stash, but honestly they're not all that expensive to buy new, and you only need a handful per bed (optimally 9-12 screws per raised bed).

The bed to the left of the "nice" one is made from fallen birch logs that I dragged out of the forest behind our house. There are no screws at all involved in that one. I pulled the logs into place, and then I used broken bricks and various small stones to hold the logs in place. I used a big squarish log that Gray couldn't get to split as an end piece, both to make up the distance of one log that was kind of short, and to make a spot to sit on while working on the garden.

German thyme
To the right of the nice bed are tires. The large tires are (very dead) tractor tires that a friend brought over for us in his truck. These, too, were freebies. Because they are so deep, I use them for root vegetables that might not do so well in our rocky New Hampshire soil. Last year I planted my beets in one of the big tires, and it was the first year I've ever gotten a real crop of beets (and I've been doing it for 20 years now!).

Currently, the second large tire hosts my herbs, however I'll be moving them to car sized tires next week. There will be two rows of tires pushed together, five on one side and four on the other. This gives me nine tires to plant in, PLUS seven little triangular spots for larger herbs. The tires themselves will be hosting my more "invasive" herbs: chives, thyme, rosemary, oregano, mint (probably two types), marjoram, sage, and cilantro. The triangles will be planted with dill, basil, and more cilantro and sage most likely. The taller plants will be easier to harvest from those middle spots.

Happy kale
You can often get tires for free. I pick mine up at the local dump, taking as many as will fit in the van each week. Check out any car repair places local to you, as well. It actually costs money to dispose of tires, and most places will be happy to give you as many as you like, in a variety of sizes. For those who question whether it's safe to use old tires in your gardens, you will have to decide for yourself. This FAQ gives a lot of really good information, but the final choice has to be your own. As you can see, I certainly don't have any concerns about using tires in my gardens! The major concern that I have is that I need to keep cold loving plants out of the tire planters during the heat of summer, because the soil becomes quite warm (black rubber heats up a LOT). They're great for over-wintering herbs and things like garlic and lettuce, though! You can also paint your tires white to help keep the heat down.

My potatoes are planted in tires this year
I use tires for my potatoes almost every year. Last year I tried a potato tower, but was underwhelmed by the results. I didn't get enough water into the tower, and so there were few potatoes. I've tried hilling potatoes as well, but it requires a lot of space and a lot of effort (digging up potatoes is hard work). With the tires, you just plant and go, and at the end of the growing season you tip the tire over and your potatoes are right there ready for you.

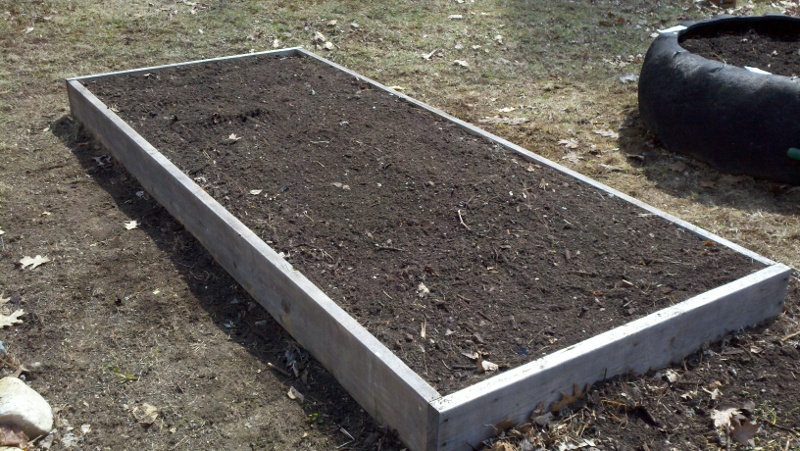
The newest raised bed
This newest raised bed was built last weekend and was wood that we had picked up at the dump. Quite often, people bring pieces of board that are no longer useful to them (this one had cracks and knots in it, for instance) but that do fine for a raised bed. We screwed it together, put it in place, and filled it. Now there are plants in it (kale and broccoli that got started weeks ago indoors) and seeds as well (lettuces, spinach, and collards).

You might be asking yourself, what about all that dirt? Soil is expensive! You're right of course. It is expensive to purchase soil. However, there are alternatives. The dump here in Jaffrey has a massive compost pile that people put grass clippings, animal manure, used soil, bits of punky logs, and a bunch of other stuff into. We hop  over in the backhoe (or the van, with buckets, or a truck) and fill up the scoop, and take it home. We do have to pick through the compost, because people do sometimes dump in things that don't compost well (rocks, the occasional beer can, bits of plastic), but it doesn't take long. Sticks and punky wood can go into the bottom of your raised bed, as can leaves, newsprint, and cardboard. The compost goes on top.

The new bed, long view
You can plant in plastic milk bins, Rubbermaid tubs, old wooden or waxed cardboard boxes (though cardboard will only be good for a year and then break down), and dozens of other things. Heck, you can even use old plastic containers from take-out food or margarine and such. People have even used old kiddie pools (the hard plastic type) and food grade plastic buckets they picked up at the grocery store. Your imagination and willingness to look and ask is all that holds you back.

Those who may be on Food Stamps or SNAP can also join in. You can use your SNAP benefits to purchase seeds! Check out your local grocery store or Agway for discount or bargain seeds. Some stores will even give away last year's seeds for free, because they don't have as high a germination rate. Ask neighbors who have gardens if they have extra seeds you could have or could trade for.

Putting the time in to grow at least some of your own food will yield so many benefits. There's the joy of seeing something grow that you're intimately involved with. Playing in the dirt is a type of anti-depression therapy, plus the extra sun helps your body manufacture seratonin, the natural chemical that helps you be happy. You will know exactly where your vegetables come from, how they were grown, and what chemicals were used on and around them. There will be no question as to whether your food is genetically modified. You'll be providing fresh and healthy food for yourself and your family. That food will lower your grocery bill during the summer, and with a bit of effort, you can put some of it away for use during the winter as well. You'll add beauty and value to your yard. You'll even have less grass to mow and water!

If you could only grow one vegetable, what would it be? 

Linked to the Homestead Barn Hop #109, Common Sense Preparedness, the HomeAcre Hop, and Tuesday With a Twist #4!

Check back often for information on canning, preserving, general homesteading and more. If you have questions or comments, please write to me below. I love to answer questions! You can follow the blog via Network Blogs and Google Friend Connect (see the left hand column for the button). If you purchase items I have linked through Amazon or the ads on my site, I receive an affiliate portion of the sale. If you find the items are useful, please purchase from my site! 
 
You may also be interested in:

Making maple syrup
Peas - an early, cool weather crop
Spring in New Hampshire
Busy days, longer days
Spring update

Monday, April 22, 2013

Making maple syrup

Pan of boiling sap
Making maple syrup is both easy and difficult at the same time. There's not a lot to it - gather sap from trees, collect it into a big pot, boil it until it becomes syrup. It sounds incredibly simple. Still, there's a certain level of art to taking raw sap and turning it into something you desperately want to pour onto pancakes in the morning.

Sap thickening slowly
You can find information on the tapping and collecting process by clicking here. Once your sap is in the bucket, you need to bring it to the place you'll be doing your boiling. It's generally considered smart to boil your sap outdoors, even if you're only processing a few pints as we did. Otherwise, the sugar that boils off will coat your walls and ceilings. I chose to boil indoors for convenience sake, and because I really wasn't set up to do it outdoors, and so I also knew I'd be spring cleaning my kitchen after I was done.

The first thing you do to your sap is filter it. It's possible to filter the raw sap through a coffee filter, but you have to be really patient. I prefer to use a sieve lined with thick cheesecloth, because the liquid runs through it much faster and it still catches any bark or bugs or other detritus in the sap. The cleaned liquid should then be poured into the largest pot or pan you have, with the biggest opening.

Sap starting to sheet
While you can certainly boil sap down to syrup in a regular soup or stock pot, it will go much faster in a long, flat pan. I used the bottom of my turkey roaster, which sits over two burners on my stove. Set your burners to just above medium and get the sap to boiling. The first hour or so you probably don't have to look at it much. As more and more water is removed, and more sugar is left behind, it will evaporate faster.

You can also pour one container into another as it boils down. I often start with three or four containers of raw sap, and as they boil down I will consolidate them into the roasting pan to finish up. If you are boiling sap and have more raw sap to add, you can do so provided it's filtered beforehand. This won't hurt your finished product at all.

Use a funnel to pour
When the sap starts to look less like water and more like a watery gravy in consistency, it's time to settle down and watch it. If you can notice it thickening at all, then you should not leave the pan for more than a minute. I find that stirring the sap with a spoon (I prefer a metal one that allows me to see the sheeting happening) helps keep the evaporation even. I'm less likely to end up with maple sugar (or worse, burnt sugar!) because it's moving around. You can also feel the bottom of the pan and can turn the heat down if it starts to get grainy.

There are many detailed instructions on how to get perfect maple syrup, and I will tell you that unless you plan on selling it, it really doesn't matter. My syrup would probably roll in at a very thick Grade A dark, if it were to be graded, but I don't bother. After all, I'm not buying it, I'm making it, and I know when it tastes right. You can follow the instructions if you like, but it will take you much longer and sometimes results in a less-than-pleasing syrup. I find that using temperature to gauge my syrup rather than palate tends to lead to a very watery syrup. I like mine much thicker!

Finished amber syrup
If you aren't using temperature as your guide, then you must watch with eyes and taste buds carefully. The hot syrup runs almost as smoothly as the cold sap, so you can't use thickness alone to make your decision. I find that dripping a bit of the syrup onto a cold plate or metal bowl allows me to see what the consistency is when it's cooled. Check the sweetness with a clean spoon (or like me, use a spatula to gather up the dribbled bits). When texture, consistency and flavor all match your liking, turn off the heat.

Let the boil stop completely before jarring up your syrup. It should still be hot, though, to allow for easier pouring. Wide mouth, pint size Ball jars work very well, as do jam jars. You can also purchase special maple syrup jars if you want to give them as gifts or just like your syrup to look professional. Use a funnel to pour into the jar, and then carefully wipe the rim with a clean paper towel or cloth to ensure there is no sap on it. Put on the lid and ring if you're using canning jars, or simply screw on the lid provided if you have syrup jars.

Maple syrup will last up to a year on the shelf, but will be good almost forever if kept frozen. In fact, a good test to see if you've done an adequate job of boiling out the water is to freeze a jar of your maple syrup. The following day, pull it out and tip the jar over. If you would be able to pour the syrup out of the jar, then you've hit the nail on the head, and your syrup is just fine; enough water has evaporated and the remaining sugar is so dense that it prevents the syrup from freezing solid.

The 2013 maple syrup yield!
Have you ever had the opportunity to tap trees or make maple syrup? Do you use maple syrup only for pancakes and waffles, or do you cook with it as well?

Linked to the Homestead Barn Hop #108, Tuesday's With a Twist #7, and Common Sense Preparedness!

Check back often for information on canning, preserving, general homesteading and more. If you have questions or comments, please write to me below. I love to answer questions! You can follow the blog via Network Blogs and Google Friend Connect (see the left hand column for the button). If you purchase items I have linked through Amazon or the ads on my site, I receive an affiliate portion of the sale. If you find the items are useful, please purchase from my site! 
 
You may also be interested in:

Peas - an early, cool weather crop
Spring in New Hampshire
Busy days, longer days
Spring update
Repotting seedlings

Thursday, April 18, 2013

Peas - an early, cool weather crop

Different kinds of peas for my garden

Peas are a wonderful early crop that you can grow here in the north. They like the cold, and even tolerate the occasional snow shower with aplomb. As long as more than half your nights are above freezing, and your soil has defrosted enough to allow you to work it, you can plant peas. In fact, the only time you want to avoid planting peas is in the heat of summer, because they do not like warm weather at all. The moist, cool days of spring are best for these hardy vegetables.

The raised bed - before
There are three basic types of peas: pod or shell peas, sugar pod or snap peas, and snow peas. Both shell and snap peas can be dehydrated and used in soups and stews later, but snow peas are best eaten fresh, or frozen quickly when they come out of the garden. There are also peas that are high in starch that are designed to be dehydrated, and they are generally a sub-category of shell peas.

The raised bed - after
Shell peas are the ones you buy at the store in cans or frozen, that have large, plump peas and no pod at all. They're great for use in soups, stews, salads of all kinds, and as a side dish. They can be canned, frozen, or dehydrated for use throughout the year. They can be eaten fresh off the vine. I love using shell peas for all sorts of things, and for me they're like popcorn on a summer evening. I can while away the time during a movie by popping the pods open and devouring the sweet treat within. I always plant a type of shell pea, and I prefer Lincoln peas because of their heritage and open germinating status, as well as their superior flavor and size.

The second type of pea that I love to plant are snap peas. These are edible podded, but with juicy little peas inside. They work best when eaten fresh or frozen for later use, and don't stand up as well to canning or dehydrating. If you have a garden that contains broccoli and cauliflower and carrots, you can freeze all four ingredients together to make something similar to the store-bought California mix, which defrosts well and cooks up quite nicely.

Marking a straight row
Snow peas are the ones we think of as being in Oriental foods. They are flat, and if they have peas inside they're minuscule. The pod is the tasty part of snow peas, and they're best served fresh. Pick snow peas in the morning, right after the sun has come up and dried the dew off them, and you'll get them at the height of flavor. Toss them in salads, serve in stir-fry, or just eat them with a bit of your favorite salad dressing.

Peas are a vegetable high in nutrient value. A whole cup of peas will rack up only 134 calories. They have no fat, incredibly low sodium, and 9 full grams of fiber per cup. They're a great source of Protein, Vitamin A, Riboflavin, Niacin, Vitamin B6, Folate, Magnesium, Phosphorus and Copper, and a very good source of Dietary Fiber, Vitamin C, Vitamin K, Thiamin and Manganese (from SelfNutritionalData).

Peas laid out in the garden
From a gardening point of view, peas are in the easy category. There's no thinning to do, and short of giving them no water at all, they tolerate being wet, dry, and cold fairly well. As soon as your ground can be hoed or rototilled, you want to get your pea seeds into the ground. Generally, this will be when daytime temperatures reach into the 60F range, and evenings move between 30F and 50F.

Plant the seeds an inch deep (to the first knuckle on your thumb) and about two inches apart, in a straight row. Generally you would plant two rows about six inches apart, and then put a pea fence in between the rows. This allows the pea vines to grow upward and support themselves. This year, I've decided to plant one ten foot row of Lincoln peas, and one ten foot row of Oregon Sugar Pod peas, on either side of a pea fence. I'm told they won't cross-pollinate, so I'm crossing my fingers!

Peas are a quick crop, taking about 60-70 days to grow to maturity. Planting them in mid-April means that my peas will be ready by mid-June, and I'll probably start harvesting them at the beginning of June. By mid-July, they'll be done giving me peas, and I can transplant fall crops like pumpkin and such into their place. Don't pull up your peas, though. They have a lot of nitrogen in their roots, and if you snip off the vines at the soil line, they will continue to amend the soil and improve it. You can plant your next crop in place around the roots of the peas.

Clearly marked rows
Once peas start producing pods, you need to keep up on harvesting them. Go out every single day and pick peas, and you will have vines that continue to produce more and more pods. Remember that a plant's job is to create seed to carry on its genes, and so by picking the pods daily, you're telling the plant that it hasn't yet fulfilled its purpose. It will continue to produce seed pods for as long as the weather and soil allow it to, in an attempt to reproduce itself.

If you want to collect your own pea seeds for next year, simply let a plant or two at the end of your row keep its pods until they turn yellowish brown and dry out. The dried pods can be collected and opened, and the peas set out in a sunny window for a couple of weeks to dry thoroughly. Dry pea seeds should be stored in a cool, dark place. I like to seal mine into vacuum seal baggies, ensuring they're kept as dry as possible.

Have you ever grown peas in your garden? What's your favorite type? Do you only plant enough to eat them fresh, or do you like to preserve your peas for the year?

Check back often for information on canning, preserving, general homesteading and more. If you have questions or comments, please write to me below. I love to answer questions! You can follow the blog via Network Blogs and Google Friend Connect (see the left hand column for the button). If you purchase items I have linked through Amazon or the ads on my site, I receive an affiliate portion of the sale. If you find the items are useful, please purchase from my site! 
 
You may also be interested in:

Spring in New Hampshire
Busy days, longer days
Spring update
Repotting seedlings
Soft sandwich bread

Wednesday, April 17, 2013

Spring in New Hampshire


Tomatoes and broccoli and kale... oh my!
Spring has finally come here in New England, and I'm glad of it! I was beginning to despair. Our nights are ranging upward in temperature, and it looks as if we're past the freezing point on them. There will still be heavy frosts through until the end of May, but it's now safe enough to plant hardy things like peas, cabbage, spinach, and other leafy greens directly into the raised beds. It's nice to know we can finally start doing things out there!

Tomatoes are sun lovers
Today's temperature was 65F in the sun, with only a bit of a breeze, so I took our larger plants out for a two hour tanning session. This is the beginning of the "hardening off" process which will lead to the plants being put outside permanently. Tomorrow, if it's warm enough, they'll go out again, for three hours. Then four, then five. When they can be out all day, hopefully our nights will all be above freezing and I can start leaving them out but under cover of plastic or glass.

Cilantro, hiding
Most of the seedlings that I planted are doing quite well. I managed to break a couple of tomatoes today during the move from indoors to out, and I cursed myself, but then realized that I started enough tomatoes to feed a small army so we'll be fine. My cilantro is doing exceptionally well, and you can see it there amidst the tomatoes. I planted several more cells worth of cilantro today, because it's a well loved herb in our house and we use it fresh in salads, as well as in salsas and stewed tomatoes and such. I'm especially pleased because this is the cilantro seed that I gathered last fall, and it's making the most beautiful wee plants.

Basil, before...
Back at the beginning of the month, I planted a few cells of sweet and Genovese basil, and they all came up well. This little guy looked tiny in his transplant cup, as did most of the other herbs that I re-potted. The chives were just tiny strings of green, and my sage had only three or four minuscule leaves. They almost looked absurd in their new homes, because they were so small and the cups looked so huge. I'm wanting to encourage heavy growth, though, and so I wanted my herbs to have lots of room for growing strong, healthy root systems. I love having the herbs in the clear plastic cups, because I can actually see many of the roots once they've established themselves, and that allows me to know before they become root bound.

Basil, after!
Now, the tiny leaves have become much larger ones. They don't look quite so small, and now they aren't anonymous green things, either. It's obvious from both their look and their smell that these little guys are basil plants. Sometime next month, they'll be transplanted out into the big tire herb garden, to grow and multiply many times over.

Today, I ended up planting more chives, as well as a lot of other veggies. I planted organic sweet bell peppers, as well as cayenne and jalapeño peppers. They're under the warm re-purposed fishtank light, keeping them quite toasty. I started some red and yellow "pear" cherry tomatoes, which look to be very delicious. I can't wait to see how they turn out!

I also started green onions in toilet paper rolls. I thought that might be best, as they can develop long root systems before transplanting into the garden, and I don't have to disturb those roots as I can plant the entire roll right into the ground. I planted Mammoth sunflowers, Shasta daisies, more cabbage, some romaine lettuce (Parris Island Cos), some heirloom marigolds (auspiciously named "Naughty Marietta"!) and some snapdragons.

All in all, it was a pretty busy day. I'm so grateful to have both the time and the ability to start all these seeds for our garden. I hope to have a bumper harvest this year!

What sort of starts do you have? Do you go for organic seeds, or heirlooms, or just whatever you can pick up at the Dollar Store? Are you a flower person, or does edible landscape appeal more to your sense of design?

Check back often for information on canning, preserving, general homesteading and more. If you have questions or comments, please write to me below. I love to answer questions! You can follow the blog via Network Blogs and Google Friend Connect (see the left hand column for the button). If you purchase items I have linked through Amazon or the ads on my site, I receive an affiliate portion of the sale. If you find the items are useful, please purchase from my site! 
 
You may also be interested in:

Busy days, longer days
Spring update
Repotting seedlings
Soft sandwich bread
What to do in the shade

Friday, April 5, 2013

Busy days, longer days

The tomatoes are growing tall
Spring is finally here, independent of the calendar! The snow, while still there, is melting quickly. Sap is running, greens are poking through the snow in the herb garden, and my greenhouse smells like a steamy garden.

Green onions... not
The one dark spot on my current planting horizon is the flat of green onions. I planted them some time ago and they are not sprouting. Admittedly, the seed was a few years old, but I had hoped. I will have to purchase new seed and get that into the flat. I don't think it's too late; I started the seeds very early this year out of desperation. Then again, I seem to remember making that desperation comment last year around this time, as well. Ah well! Nothing is quite so nice as fresh green onions diced in a salad of greens you've grown yourself.

Kale, repotted
My kale is doing 100% better than the green onions, that's for sure. It took very little time for them to germinate. The rate of germination wasn't as high as I'd hoped (only nine out of the 24 seeds sprouted), each of the plants that made it is healthy and vigorous. They're happily stretching out their roots in their new, more spacious homes. I love my plastic cups, because they're cheap and easy, and they make excellent planters.

Beets, sage, and basil
The sage has been slow to come, but now seems to be doing quite well. The beets are fantastic. I have no idea if they'll survive transplanting, but these were intended more to be a germination test than anything else. Beets generally do best when direct seeded into the soil, because they create a taproot which is easily damaged. Sweet basil is coming up gangbusters, too, stretching its little leaves to the sunlight. I've been pleased with how well each of these seeds germinated, as they're all a year out of date. I also planted oregano, a year old, which did not germinate at all. I'm keeping copious notes, so that I know how long seeds will keep. Oregano apparently is not something to keep for more than one year, but peas, beans, and some other herbs have done quite well despite being out of date.

Broccoli, transplanted
Of all the transplanting I've done, the broccoli was the worst. Tomatoes have stems that break easily, so you need to be really careful with them when re-potting. Broccoli, on the other hand, is just all-over fragile. I managed to break about nine of the plants beyond repair during the repotting process. Still, there were so many that came up (100% germination!) that losing those few didn't hurt as much. I've put the broccoli into plastic cups as well, and despite looking a bit weary immediately after, they're now perky and happy in their new homes.

Greenhouses
I know I've mentioned my love of these greenhouses before, but I simply can't say it often enough. They were easy to put together, and beyond a few zip ties to keep things more secure, required no special tools. They've held the heat even when our house temperature dropped below 55F. They've kept the plants in a moist atmosphere despite being right beside our wood stove, which has been used on and off since we filled the greenhouses. They were an excellent purchase, and I'm forever grateful to Ms. T. for picking them up.

Until a couple of days ago I was only using one of the greenhouses, with the other one having some houseplants I was rehabbing, and my garden supplies. We've run out of room, however! I had to move the tomatoes (pictured above) into the second greenhouse. They were actually growing so quickly that I'm hoping the reduction of the light on them might hold them back just a wee bit. I'm still impressed with myself for creating tomato seedlings that are almost five inches tall!

Rhubarb peeking up
Outside the Freehold, we're finally seeing a few signs of life. The snow is still pretty deep in some spots, but the sunny area that encompasses the garden is rapidly melting. The rhubarb that I planted last year seems to be coming up wonderfully, and I've covered it with a clear plastic tub to "force" it to develop stems and leaves earlier. This is a common practice, especially in colder climates like our own. I have never done it before, but figured it was worth an attempt. Our family has a deep love for strawberry rhubarb pie, and so I really want this to work!

Worms!
One of the best signs of it really being spring was found underneath a box that I'd inadvertently left sitting out all winter. When I moved the box, there were fat, happy worms wriggling there. I'm pleased that our soil naturally has these fat, hungry little guys residing in it. It means that the soil is healthy, and that it's life-sustaining. The other bit of spring that I hope to see soon comes in a little green hopping package. Frogs abound on our property, another healthy sign. Our children spend their summers catching them, keeping them around for a day or two to watch, then setting them free again to be with their fellow frogs. We also have newts, salamanders, and some snakes, all of whom have found their way into our observation tank. Talk about education!

The current raised beds
Our raised beds got quite buried over the winter. From late November until just this week, these beds were under a couple of feet of snow. I wish I'd followed through on my intention to cover them with newspaper at the end of the harvest last year, but I didn't. The soil looks great, though it's still frozen quite solid. As soon as I can effectively hoe the soil, though, we'll be putting in our Lincoln peas, snap peas, and our green beans. Every day I'm out there, kicking the dirt with the toe of my bright red wellies, hoping it'll clump and crumble instead of thumping.

Mt. Maneenee
There's still a lot of snow out there. For some reason, hubby piled all the snow on top of my tire beds, so those are still a few days away from being free and clear of the pile. The kids have been packing it down all winter, too, using it as their "mountain hideaway" which they called Mt. Maneenee. Still, all that snow had to go somewhere, and where it currently sits will melt quickly and leave me with well moistened soil.

Herbs returning
The herb bed is harboring life, despite being buried beneath the mountain. I can see parsley returning, something I didn't expect since I bought cheap pre-grown clumps of it last year. Some of the chives appear to have died off, but more of it is coming up cheerily. I have some in the greenhouses to supplement, so I'm not too worried. The German thyme looks to be returning as well, although it's touch and go at the moment.

The compost pile
Our compost pile has done well over the winter, maintaining enough heat that it was almost snow free for most of the time. It desperately needs turning now, but until I dig out our garden tools from the shed, I'm afraid it's not going to happen. I need my manure fork, a metal behemoth with four, wide set tines. It digs deep into the warm interior of the pile, and lets me turn large chunks of compost, revealing the rich dirt below. We cheated just a little, adding some already-finished compost (with excellent worms) to the pile before it got cold last year. I'm expecting great things from the bin this year!

The site of the hen house
Each year, I try to expand the garden in some way. This year, being only our second on this new Freehold, will include the addition of a lovely chicken coop, to be occupied by ten or so fat and contented brown egg layers. Our family can eat a LOT of eggs, and it isn't unusual for us to put away three to four dozen eggs in a week. If we decide on a "breakfast for dinner" night, that number can reach as high as six dozen! Chickens are on the "must get" list for this year, and as soon as it's warm enough for new chicks to be brought in and not die on us, we'll have our new coop brought in and installed. We'll be running electricity and water to the coop (and a new shed we hope to put beside it) underground, thanks to Gray's backhoe. We'll be able to put the piping a good three feet below the surface of the ground, which ought to keep it from freezing all winter. The spot where the water comes out for the chickens will have to have a heat light shone onto it in order to keep it flowing, but it's doable. I can't wait...

The new orchard
We have a huge, semi-circular driveway, suitable for parking about 20 cars in. This is just too much for even our large family. We've decided to take a huge chunk of the driveway, and remove it. The resulting space will have good compost put down, sod laid on top, and fruit trees planted. We currently have plans for two more apple trees to supplement the one we have, two peaches, two plums, and two pears. We'll also be picking up several blueberry bushes, some raspberries, and blackberries. With any luck, we'll be able to put a nice shade in the area center of the picture to the right, suitable for a picnic table or table and chairs, and perhaps a hammock.

New raised beds
At least three new raised beds will go in this year. They'll be on the opposite side of the driveway (to the right in the above picture, whereas the current raised beds are to the left). The new spot (pictured left) is a bit more shady, but still gets about five hours of sunlight a day, and possibly more. This will be our spot for greens, beans, and other shade-loving plants. We'll be building the beds out of scrap lumber we've picked up at the dump and from craigslist, so they're free, for the most part, aside from a few nails. Then we'll get Gray to pick up several square yards of good compost from the dump, where they give it away for free. There's no way we could fill all these raised beds with good enough soil if it weren't for the wonder of our dump.

The cornfield
My last innovation is our corn field. Last year we used one of the raised beds as a corn field, albeit a tiny one. This year, I need that space for the large number of tomatoes we've sprouted. Each of these plastic tubs will be lined with a black garbage bag, and a few holes will be poked for drainage. Dirt will be put into them, and five corn seeds will be planted in each: the four corners and one in the center. During germination and early growing, they can be shoved all together, and if it gets cool some nights, we can toss a tarp over them easily enough. When they start to tassel and fertilize one another, we'll set up the tubs in a checkerboard pattern, allowing the spacing for good cross fertilization. I expect it'll look fairly nice, too! In the fall, after the corn is collected, we can just dump the soil out into our compost bins, to be recycled with the various other compost.

What amazing plans do you have for your garden this year? Are you a balcony gardener, or a farmer with acres of room to spare? Share your dreams and plans with us!

Check back often for information on canning, preserving, general homesteading and more. If you have questions or comments, please write to me below. I love to answer questions! You can follow the blog via Network Blogs and Google Friend Connect (see the left hand column for the button). If you purchase items I have linked through Amazon or the ads on my site, I receive an affiliate portion of the sale. If you find the items are useful, please purchase from my site! 
 
You may also be interested in:

Spring update
Repotting seedlings
Soft sandwich bread
What to do in the shade
Tapping trees