Showing posts with label spring. Show all posts

Thursday, May 30, 2013

Busy busy!

This weekend I'm heading up to Lovell, Maine to preach at a little church there. This has left me little in the way of blogging time. However, I did do work on the garden with Ms. T's help, so here are some pictures to tide you over!


This is the front garden, which is basically right outside our front door. The hydrangea was my Mother's Day gift from the twins last year, and the sweet william was this year's gift! The pansies are sis's beautiful annuals. I do need to build this garden up a bit, but it's so pretty when it's in full bloom.


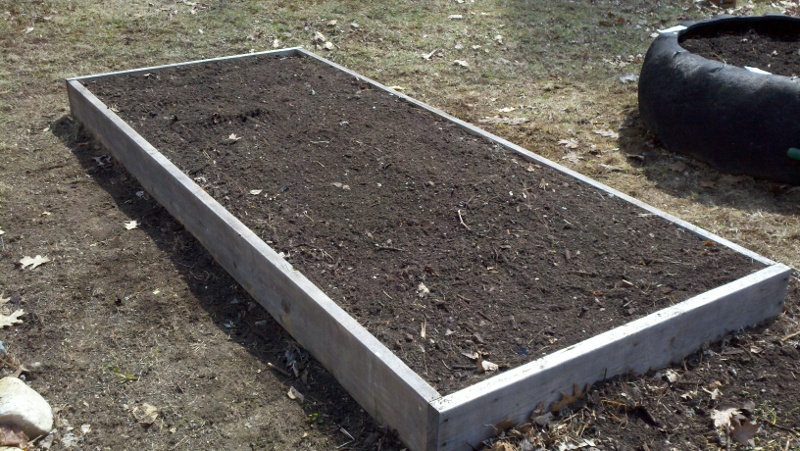
This is what I am guessing will end up being the squash bed. It got dumped full of unsifted dirt, and now we're working our way through it and putting the dirt in different beds. We've finally gotten it down far enough that we can start putting soil back into it (sifted, of course). This is one of the new beds. In the back of it, you can just see the split rhubarb/horseradish bed.


Ah, there's my rhubarb! That's the stuff I planted last year, and which we transplanted to this bed a few weeks ago. There are two more rhubarb crowns in that bed, and two in the bed closest to the camera (beside the stone). The back of the rhubarb bed is filled with four horseradish roots, which I hope will come up.


 This is (will be) our asparagus bed. We have two kinds of asparagus to plant in it, and it's the next on our sift list. Beside it will be a bed of strawberries. These are right under sis's window, and ought to provide an interesting visual!


These lovely window boxes were created by sis last weekend, to cover up the gravelly messy part beside our front steps. However, with the torrential rains, they have gotten so waterlogged that I had to bring them onto the porch. I'm going to leave them here for a few days until they dry out. 
 

This is the start of the rock wall that Ms. T is making. You can just see the two loads of dirt in the left of the picture, which will be filling up the entire space. The yard slopes down at that point, and we're going to flatten it out and bring it into a berm that is held in place by the rock wall. Ms. T has some great talents, and rock building is definitely high on the list. I just don't have the patience for it!


My kale and broccoli, unlike the rest of the plants, have really loved the frosts of the past week. They're growing like crazy! I am hoping that the heat they're predicting for this week won't stunt the growth that's been happening. They're in a shadier part of the yard, so I'm holding out hope.


My potatoes are ready to have another tire stacked on top. They're really lush and looking good, much nicer than last year's greenery.


 This is a long view of the side yard where the garden is. The empty bed you see is actually going behind the pea bed and beside the squash bed, but we're using the backhoe to move dirt, so we can't block in that squash bed until it's full. To the right you can see the two tire beds, and beyond those (out of the picture) are the herb tires.


This is the bed that we put together last year with just logs. It's a hugelkultur bed,  meaning there are punky logs and branches and leaves buried under the soil, providing nutrients and helping to hold moisture in. We raised this one up a bit, because the single logs weren't providing enough room for things to grow. So the bricks from the dismantled fire pit became one side (and the little holes are going to get filled with flowers and green onions!), and the log that was on that side got piled up on the other side. Now it's twice as deep, and full of gloriously rich composted soil.


My peas (left) and tomatoes (right) seem to be doing alright. We doubled the height of the pea fencing this year, because last year we had the peas falling over and grabbing other plants. I think we're safe this time! The tomatoes are doing better than they look here, as these were freshly battered by a storm. They're much perkier now, and most of my non-cherry tomatoes are planted in this bed. To the far right is a staggered row of romaine lettuce, which I hope will enjoy the shade it's soon to get from the tomato plants.


 The big green things are radishes, intermixed with carrots. I desperately need to thin out the radishes. We're going to be collecting the leaves, dehydrating them, then turning them into a slightly spicy powder to use in sauces and stews. The other half of this bed has baby beets in it, which also need to be thinned and weeded, but I have to wait 'til they're a bit bigger.


The tires are going to be planted with pole beans either this weekend or early next week. A three pole tee pee will go up in each tire, and then jute cord or wire will be twined around. The beans will be planted in a circle, and be trained up the legs and jute. I expect these to get up to 12 feet high!

So there's my little update. :) I promised pictures to people, and so I have kept good on my promise! What's your garden up to?

Check back often for information on canning, preserving, general homesteading and more. If you have questions or comments, please write to me below. I love to answer questions! You can follow the blog via Network Blogs and Google Friend Connect (see the left hand column for the button). If you purchase items I have linked through Amazon or the ads on my site, I receive an affiliate portion of the sale. If you find the items are useful, please purchase from my site! 
 
You may also be interested in:

Insanity in the garden
Garden update and my contest win
It doesn't have to be expensive
Making maple syrup
Peas - an early, cool weather crop

Thursday, April 18, 2013

Peas - an early, cool weather crop

Different kinds of peas for my garden

Peas are a wonderful early crop that you can grow here in the north. They like the cold, and even tolerate the occasional snow shower with aplomb. As long as more than half your nights are above freezing, and your soil has defrosted enough to allow you to work it, you can plant peas. In fact, the only time you want to avoid planting peas is in the heat of summer, because they do not like warm weather at all. The moist, cool days of spring are best for these hardy vegetables.

The raised bed - before
There are three basic types of peas: pod or shell peas, sugar pod or snap peas, and snow peas. Both shell and snap peas can be dehydrated and used in soups and stews later, but snow peas are best eaten fresh, or frozen quickly when they come out of the garden. There are also peas that are high in starch that are designed to be dehydrated, and they are generally a sub-category of shell peas.

The raised bed - after
Shell peas are the ones you buy at the store in cans or frozen, that have large, plump peas and no pod at all. They're great for use in soups, stews, salads of all kinds, and as a side dish. They can be canned, frozen, or dehydrated for use throughout the year. They can be eaten fresh off the vine. I love using shell peas for all sorts of things, and for me they're like popcorn on a summer evening. I can while away the time during a movie by popping the pods open and devouring the sweet treat within. I always plant a type of shell pea, and I prefer Lincoln peas because of their heritage and open germinating status, as well as their superior flavor and size.

The second type of pea that I love to plant are snap peas. These are edible podded, but with juicy little peas inside. They work best when eaten fresh or frozen for later use, and don't stand up as well to canning or dehydrating. If you have a garden that contains broccoli and cauliflower and carrots, you can freeze all four ingredients together to make something similar to the store-bought California mix, which defrosts well and cooks up quite nicely.

Marking a straight row
Snow peas are the ones we think of as being in Oriental foods. They are flat, and if they have peas inside they're minuscule. The pod is the tasty part of snow peas, and they're best served fresh. Pick snow peas in the morning, right after the sun has come up and dried the dew off them, and you'll get them at the height of flavor. Toss them in salads, serve in stir-fry, or just eat them with a bit of your favorite salad dressing.

Peas are a vegetable high in nutrient value. A whole cup of peas will rack up only 134 calories. They have no fat, incredibly low sodium, and 9 full grams of fiber per cup. They're a great source of Protein, Vitamin A, Riboflavin, Niacin, Vitamin B6, Folate, Magnesium, Phosphorus and Copper, and a very good source of Dietary Fiber, Vitamin C, Vitamin K, Thiamin and Manganese (from SelfNutritionalData).

Peas laid out in the garden
From a gardening point of view, peas are in the easy category. There's no thinning to do, and short of giving them no water at all, they tolerate being wet, dry, and cold fairly well. As soon as your ground can be hoed or rototilled, you want to get your pea seeds into the ground. Generally, this will be when daytime temperatures reach into the 60F range, and evenings move between 30F and 50F.

Plant the seeds an inch deep (to the first knuckle on your thumb) and about two inches apart, in a straight row. Generally you would plant two rows about six inches apart, and then put a pea fence in between the rows. This allows the pea vines to grow upward and support themselves. This year, I've decided to plant one ten foot row of Lincoln peas, and one ten foot row of Oregon Sugar Pod peas, on either side of a pea fence. I'm told they won't cross-pollinate, so I'm crossing my fingers!

Peas are a quick crop, taking about 60-70 days to grow to maturity. Planting them in mid-April means that my peas will be ready by mid-June, and I'll probably start harvesting them at the beginning of June. By mid-July, they'll be done giving me peas, and I can transplant fall crops like pumpkin and such into their place. Don't pull up your peas, though. They have a lot of nitrogen in their roots, and if you snip off the vines at the soil line, they will continue to amend the soil and improve it. You can plant your next crop in place around the roots of the peas.

Clearly marked rows
Once peas start producing pods, you need to keep up on harvesting them. Go out every single day and pick peas, and you will have vines that continue to produce more and more pods. Remember that a plant's job is to create seed to carry on its genes, and so by picking the pods daily, you're telling the plant that it hasn't yet fulfilled its purpose. It will continue to produce seed pods for as long as the weather and soil allow it to, in an attempt to reproduce itself.

If you want to collect your own pea seeds for next year, simply let a plant or two at the end of your row keep its pods until they turn yellowish brown and dry out. The dried pods can be collected and opened, and the peas set out in a sunny window for a couple of weeks to dry thoroughly. Dry pea seeds should be stored in a cool, dark place. I like to seal mine into vacuum seal baggies, ensuring they're kept as dry as possible.

Have you ever grown peas in your garden? What's your favorite type? Do you only plant enough to eat them fresh, or do you like to preserve your peas for the year?

Check back often for information on canning, preserving, general homesteading and more. If you have questions or comments, please write to me below. I love to answer questions! You can follow the blog via Network Blogs and Google Friend Connect (see the left hand column for the button). If you purchase items I have linked through Amazon or the ads on my site, I receive an affiliate portion of the sale. If you find the items are useful, please purchase from my site! 
 
You may also be interested in:

Spring in New Hampshire
Busy days, longer days
Spring update
Repotting seedlings
Soft sandwich bread

Monday, March 25, 2013

Spring update!

Snap peas in the window
There's something wrong about it being past Equinox and there still being two feet of snow outside. I can't see my raised beds because of the depth of the snow. However, indoors we're doing quite well. We started these snap peas from seeds I saved last year, and as you can see they're doing quite well! We have little wood dowels for them to climb up, held in place by a piece of cord suspended between two suction cups with hooks. The seeds are basically up to the cord now, and rapidly attaching themselves to it! I have no idea if they'll live when we move them outdoors, but it's definitely nice to have a little bit of greenery in the house.

In the greenhouse...
Our greenhouse is basically full now (well, one of them is). The top level, which has only one small fish tank light over it (but also receives good light from the window) has our brand new seeds on it. There's some more tomatoes, and then two kinds of basil, some beets, and some oregano and sage. The herbs are all last year's seed, so I don't know if they'll sprout, but I wanted to have a good start if they do. As for the tomatoes, I've been planting them in waves, two to four weeks apart, in the hopes that we'll get tomatoes in shifts, rather than all at once.

Tomatoes!
The tomatoes we planted earlier in the month are doing very well indeed. The Romas seem to be doing best, but even the Cherokees are growing apace now. All of the tomatoes that were planted before now have true leaves, and some of them have several sets of leaves already. Opening the greenhouse is a joy, as the scent of tomato and herb and dirt waft out and cover you. It's like antidepressant in a scent! I opened the greenhouse yesterday to move things around and ended up just standing there, sniffing, for about five minutes. The warmth radiating out, the smell, the very feel of it was spring-like.

Kale and broccoli
The kale and broccoli from last weekend are coming up great guns. The chives are perky as well. I suspected that they weren't getting quite enough light due to how we had the greenhouse set up, so Miss T and I rearranged the entire greenhouse to better situate the plants. We added two more lights as well, so that there is artificial "sunlight" on all four shelves. The bottom layer has the big tomatoes, then above that are the smaller tomatoes. On the second shelf you can find my kale and broccoli, and the top shelf has the not-yet-germinated seeds.

The greenhouse
I have to say, for the price these little greenhouses have been worth their weight in gold. I love that all my gardening stuff is in one place, and that all the plants are together in a warm, moist environment. Because we use the woodstove for heat, I was expecting to see my plants be very dry, but the greenhouses have kept them moist and happy.

We made a few minor tweaks to the greenhouses. When I put them together, the shelves seemed to be slightly off kilter, so I used zip ties to hold them in place. This had the added benefit of squaring up the greenhouse and giving it a bit of added stability. We've lined each metal wire shelf with tin foil, both to keep drips under control and to make the light reflect better. It's much brighter inside since we added the tin foil!

The lights themselves are ones we picked up at a local hardware store, but they're also available at Walmart and other similar stores. They're very bright, cheap, and they hook up in tandem, meaning we only need to have one plug attached and the rest can be hooked up to each other in a long string. They came with little covers over the lights, which we removed before installing in order to get better lighting. Technically, they're designed to go under cabinets!

What sort of seeds are you starting this year?

Check back often for information on canning, preserving, general homesteading and more. If you have questions or comments, please write to me below. I love to answer questions! You can follow the blog via Network Blogs and Google Friend Connect (see the left hand column for the button). If you purchase items I have linked through Amazon or the ads on my site, I receive an affiliate portion of the sale. If you find the items are useful, please purchase from my site! 
 
You may also be interested in:

Repotting seedlings
Soft sandwich bread
What to do in the shade
Tapping trees
Farmageddon


Wednesday, March 13, 2013

What to do in the shade

Bountiful carrots (2010)

When you planned your garden, you probably picked out the most sunny part of your yard as The Spot. After all, vegetables love sun, and they need enough of it to produce fruit. This is fantastic if you have a huge yard that isn't surrounded by shady trees. It's not so great if part or most of your yard is covered in shadow for several hours a day. Do not despair, though!

There are several plants that do very well in shade. Leafy greens are the ones most people are aware of, and it's true that lettuce, cabbage, chard, all salad greens, and even spinach and kale all love the shady spots. You can safely plant them where tomatoes wouldn't grow.

Beans (2009)
That's not the only thing to do with your shady bits, though. Broccoli and cauliflower both grow very well in the shade, as do beets, brussel sprouts, and beans. You can even grow peas and radishes in less sunny spots with no harm to your plants whatsoever.

The general rule that's used is that if a plant is grown for its leaves, then it's safe to plant in a shady spot, provided it gets at least a couple of hours of sun per day. If it's grown for the root (potatoes, beets, parsnips), it is shade tolerant, and can go somewhere that gets four to five hours of sun a day with no problem. Vegetables grown for a fruit that comes from a flower (zucchini, tomato, green peppers) need as much sun as they can get, and eight or more hours of sunlight is optimum for them.

Giant cabbage (2010)
This year, we'll be putting in three new raised beds on the shady side of our driveway. These beds will be just for our leafy greens and shade tolerant vegetables. It's there that I'll plant the summer crops of spinach, salad greens, my cabbages, and some of our beans. The sunny spots, which get many hours of sunlight a day thanks to our yard's layout, will get our tomatoes, squash, watermelon, corn, and other sun-loving veggies.

It's my hope that this way of planting will increase the yield in our garden by at least a multiple of two. We will be adding a third more raised beds, but because of how we'll be planting in those raised beds, we should see a lot more production than we did last year. Last year wasn't a bad run, either!

What sort of vegetables do you intend to grow this year? Do you have special micro-climates to overcome in your yard?

Broccoli (2010)
REMINDER: If you are in New England and plan to grow broccoli and/or kale this year, now is the time to start them indoors. Both require planting before we stop getting frosts, in order to get their best growth. Broccoli in particular needs to be started indoors six to eight weeks before transplanting into the garden, and it should be transplanted outdoors about four weeks before our last frost!

This post was shared at the Homestead Barn Hop #103!

Check back often for information on canning, preserving, general homesteading and more. If you have questions or comments, please write to me below. I love to answer questions! You can follow the blog via Network Blogs and Google Friend Connect (see the left hand column for the button). If you purchase items I have linked through Amazon or the ads on my site, I receive an affiliate portion of the sale. If you find the items are useful, please purchase from my site! 
 
You may also be interested in:

Tapping trees
Farmageddon
Tires
New life!
Keeping warm

Friday, March 1, 2013

New life!

Snap peas!
Yay, new life on the freehold! Of the six snap peas I planted, five have already sprung out of the dirt. These three were the most happy ones, though, so I'm sharing their picture. Look at those pale green heads! The scent of dirt and fresh plants is so strong in the mini greenhouses that I just want to snort it all up.

Chives!
If you look closely, you can see the feathery start of the chive plants, too. They're the first of the few things we planted on Sunday, and it's so exciting to see them rearing their beautiful little heads.

Today's weather seems to bode well for upcoming springtime, too. It isn't warm, per se, but it is in the low 40s, and all the snow is melting. There's slush and dirty run-off everywhere. I'm sure the basement is soaked by now, as it happens every spring.

Still, I don't care. I have seedlings springing up, and there's warmth in the air that wasn't there before. Yay for gardens!

Shared at the Backyard Farming Connection Hop #22.

Check back often for information on canning, preserving, general homesteading and more. If you have questions or comments, please write to me below. I love to answer questions! You can follow the blog via Network Blogs and Google Friend Connect (see the left hand column for the button). If you purchase items I have linked through Amazon or the ads on my site, I receive an affiliate portion of the sale. If you find the items are useful, please purchase from my site! 
 
You may also be interested in:

Keeping warm
Quick pesto'd pasta with oysters
A good weekend's work
Making and using greenhouses
Busy day round-up