

Showing posts with label plans. Show all posts
Showing posts with label plans. Show all posts
Monday, September 2, 2013
Guest Post: Ready Nutrition

Friday, April 5, 2013
Busy days, longer days
 |
| The tomatoes are growing tall |
 |
| Green onions... not |
 |
| Kale, repotted |
 |
| Beets, sage, and basil |
 |
| Broccoli, transplanted |
 |
| Greenhouses |
Until a couple of days ago I was only using one of the greenhouses, with the other one having some houseplants I was rehabbing, and my garden supplies. We've run out of room, however! I had to move the tomatoes (pictured above) into the second greenhouse. They were actually growing so quickly that I'm hoping the reduction of the light on them might hold them back just a wee bit. I'm still impressed with myself for creating tomato seedlings that are almost five inches tall!
 |
| Rhubarb peeking up |
 |
| Worms! |
 |
| The current raised beds |
 |
| Mt. Maneenee |
 |
| Herbs returning |
 |
| The compost pile |
 |
| The site of the hen house |
 |
| The new orchard |
 |
| New raised beds |
 |
| The cornfield |
What amazing plans do you have for your garden this year? Are you a balcony gardener, or a farmer with acres of room to spare? Share your dreams and plans with us!
Check back often for information on canning, preserving, general homesteading and more. If you have questions or comments, please write to me below. I love to answer questions! You can follow the blog via Network Blogs and Google Friend Connect (see the left hand column for the button). If you purchase items I have linked through Amazon or the ads on my site, I receive an affiliate portion of the sale. If you find the items are useful, please purchase from my site!
You may also be interested in:
Spring update
Repotting seedlings
Soft sandwich bread
What to do in the shade
Tapping trees
Thursday, February 14, 2013
Seedling trays
 |
| Seedlings in a tray (1) |
That's not true. I did buy one, one year, and while it worked just fine it didn't work so much better than my usual methods that I'd bother doing it again. Instead, I re-use items from around the house that would otherwise get trashed, for starting my seedlings in!
 |
| Plastic tray from the swap shop |
Don't forget about small sour cream containers, and the ones your single-serve yogurt comes in. Any small plastic container can be used to grow plants in, and some metal ones too! This year I'll be adding a few herbs to my windowsill in the cleaned out tins my Hungarian paprika comes in.
 |
| Egg carton planter |
 |
| A plastic bag holds in moisture |
 |
| The necessary tools |
 |
| Mark 1.5" from the end and cut |
 |
| Fold in the flaps |
The major difference between the egg cartons and toilet rolls, and the plastic containers, is that the former can go right into the ground without ever disturbing the roots of your seedlings. Plastic containers should be tipped upside down and tapped or gently squeezed to release the plants and dirt from the plastic. Plastic ones work better for larger plants like squash and corn, if you happen to be starting them indoors.
When it comes to seed starting, you can even start a handful of seeds indoors that you might normally put right outside. Cucumbers, for instance, normally just go outside in June and are planted in the soil directly. However, by starting two or three seedlings indoors, you can have vines already growing when you put the rest into the garden as seed. This gives you a handful of slicing cucumbers weeks earlier than you'll get the in-ground ones. The same can go for any plant, really.
It's economical and educational to start your own seeds, indoors or out. A packet of seeds costs less than a dollar in many stores, and not much more than that even for open pollinated or organic seeds. The same plants as starters, purchased from a nursery or other store will cost you at least that much per plant! Starting those seeds at home gives you the opportunity to be a part of the life cycle of your plant, and lets you teach your children the value of life. It gives you control over what your plants grow in, and what pesticides and chemicals they are introduced to. Add to that, there is a definite feeling of accomplishment you get when you pick a tomato or eggplant that you've nursed from seed to fruit. You can taste the love, the freshness, the glory in it as you eat it.
Shared at the Backyard Farming Connection Hop #20!
Shared at Eco-Kids Tuesday!
Shared at The HomeAcre Hop #7!
Check back often for information on canning, preserving, general homesteading and more. If you have questions or comments, please write to me below. I love to answer questions! You can follow the blog via Network Blogs and Google Friend Connect (see the left hand column for the button). If you purchase items I have linked through Amazon or the ads on my site, I receive an affiliate portion of the sale. If you find the items are useful, please purchase from my site!
You may also be interested in:
Bread again!
One Pan Chicken Wonder
Planning for Spring
Mara's Pasta - last chance to win!
Review #2 - Mara's linguine
1) Image by mrmac04 / morgueFile
Tuesday, January 29, 2013
Planning for spring
 |
| The winter garden (1) |
Yesterday, I set down to planning. The first thing I did was look up each seed to see when it needs to be planted. Most of them give you an answer that requires a bit of math. You'll see something like, "Plant after all danger of frost is past." Or better yet, "Plant indoors five weeks before last frost date. Transplant to the garden two weeks after last frost date." It's frustrating, but it's worth the fuss of going over the calendar and writing it all down.
My planting season starts outside (believe it or not!) in March sometime, "as soon as the soil can be worked." That means as soon as my raised beds can be hoed properly, it's time to plant my peas and some of my beans. I'll tuck them into the soil about an inch deep, then mulch over them to keep them safe.
 |
| Seed packages (2) |
I then have tomatoes that get planted in flats on April 7, chives on April 20, spinach that goes right outside on April 20, and bunches of other things right up until our last frost date of May 20. The very last thing to go into my garden will be my cucumbers, which need very warm soil. They'll be put into the ground on June 3. Each of the dates I figured out went into my Google calendar and my paper desk calendar. Each day as I sit down to work, I'll be able to see what needs to be done that week in the garden.
Once I knew all the dates they had to be planted indoors, then transplanted outdoors, or planted directly outdoors, I sat down and went over all of them again to figure out when I ought to start looking for harvest. Each seed packet tells you the number of days until harvest (for example, my Amish Paste tomatoes mature in 81 days). The harvest days go onto the paper calendar but not into my computer one, because it's much less exact. For instance, my dill will mature in 60 to 70 days, however I might find that parts of it mature faster or slower, and I'll probably begin pulling some of the baby dill long before it reaches maturity. I might also choose to pick a few green tomatoes in order to make a green tomato pie or fried green tomatoes.
 |
| My cork board |
I spend less time planning out my actual beds. Last year I made elaborate "to scale" models on graph paper. The first problem came when my model said "rectangular raised bed" and reality provided me with a tractor tire. It all went downhill from there. Everything still got planted, of course, but it was all in different places in the garden.
 |
| Plans from 2012 |
There are other things I need to keep in mind while in the garden. Certain types of plants don't do well together, and others prefer one another's company. I don't want to plant my watermelons beside my cucumbers, as I don't want to find a foul tasting hybridized mix of the two growing somewhere. Different types of winter squash must be kept apart, too. If you plan on saving seeds, you probably shouldn't plant different breeds of tomatoes near one another, either. When you have a small garden, that can make planning quite complex as you try to shuffle things around to make space between veggies that dislike one another.
I can't wait for March!
Listed on the Backyard Farming Connection Hop #17 (click here to enter).
Listed on Eco-Kids Tuesday (click here to enter).
Listed on the Homestead Barn Hop #97 (click here to enter).
Check back often for information on canning, preserving, general homesteading and more. If you have questions or comments, please write to me below. I love to answer questions! You can follow the blog via Network Blogs and Google Friend Connect (see the left hand column for the button). If you purchase items I have linked through Amazon or the ads on my site, I receive an affiliate portion of the sale. If you find the items are useful, please purchase from my site!
You may also be interested in:
Mara's Pasta - last chance to win!
Review #2 - Mara's linguine
How to cook a wild turkey
Review and giveaway!
How to: perk coffee
1) Image by Ladyheart / morgueFile
2) Image by xandert / morgueFile
Monday, January 14, 2013
Winter Wonders - Making a planting schedule

When figuring out planting dates, the first task we have to complete is finding out our last frost date for the winter. According to the almanac, here in New Hampshire our last spring frost date is around May 20th, and we have a growing season of about 124 days.
Our seed catalog tells us that tomatoes take 40-60 days to mature, and do not do well until the soil temperature hits about 60F. This means that planting tomato seeds directly into the ground is going to yield few, if any, tomatoes. We'll need to start this indoors. We know that by Memorial Day the soil is about the right temperature, and our seed packets will tell us that sowing about six weeks before the last frost date is just about right. Counting six weeks back from May 20 puts us at an indoor sowing date of around April 1 through 8.

We also know tomatoes need full sun in order to produce well. This means we have to make sure that they aren't shaded by anything else in the garden. If you plant something tall near tomatoes (like sunflowers, for instance), be sure to put the tomatoes on the sunny side, so the towering flowers don't hide them from the sun.
Each plant you want to grow needs to be given the same attention to detail, counting back to plant dates based on the last frost date. Some vegetables, such as peas, actually enjoy a little frost and will sprout better in cooler soil. Read the information on the back of each and every seed packet you purchase, and read up on the plants on the internet, too. If you're still not sure, call your local Agricultural Extension and they will have the answers you need.
When planting indoors, remember that you will need to water frequently. Some seeds may need special circumstances in order to sprout properly. These might include overnight chilling in the fridge or a snow bank, a warm seed mat to raise the temperature, or a breeze to make the stems work out once they do sprout.

Once you know all the dates you ought to be planting on, write them onto your calendar or in a prominent place. I put mine both onto my desk calendar, and onto my Google Calendar (which emails me 24 hours beforehand to remind me to do things!). I know when to plant things indoors, when to move them onto the porch to harden, and then when to plant them out in the garden. I also make note of where in the garden they should go, so that when the time comes it's just a matter of going out, digging up a spot, and putting them gently in their new home.
The more planning you do now, the better your garden will be in May. Once spring rolls around, you'll be busy with other things, and there won't be as much time for all this planning. By putting the time in now, you save yourself time and effort later!
Linked to from The HomeAcre Hop! Want to enter? Click here! Also shared at the Homestead Barn Hop #95 (click here to enter)!
Check back often for information on canning, preserving, general homesteading and more. If you have questions or comments, please write to me below. I love to answer questions! You can follow the blog via Network Blogs and Google Friend Connect (see the left hand column for the button). If you purchase items I have linked through Amazon or the ads on my site, I receive an affiliate portion of the sale. If you find the items are useful, please purchase from my site!
You may also be interested in:
Winter Wonders - the seed catalog
Mexican Meatloaf
Lentil Soup is a new favorite
Oyster Soup from the Little House
Winter is here!
Wednesday, January 9, 2013
Winter wonders - the seed catalog
 |
| Catalogs galore! |
January is one of the best times in the world for people who like to dream of gardening. There's not really anything outdoors to be done, at least in New England, but you can sit and dream and plan to your heart's content. January is the time when the seed catalogs start arriving!
So far, I've gotten eight of them, and I'm expecting several more over the next couple of weeks. I have the "standard" one, Burpee, because there are a few things I like to buy from them even though they're known to consort with evil corporations like Monsanto. They do carry some organic seeds now, too. I have Miller Nurseries as well, which is largely for fruits and perennial vegetables. The third normal catalog I get is Gurney's and I very rarely buy anything from them. However they sometimes send me $10 off coupons with no restrictions, so I'll go buy exactly that much (including shipping) so I get something for free. I'm wary of Gurney's though, as they do sell seeds tainted by the GMO monster.
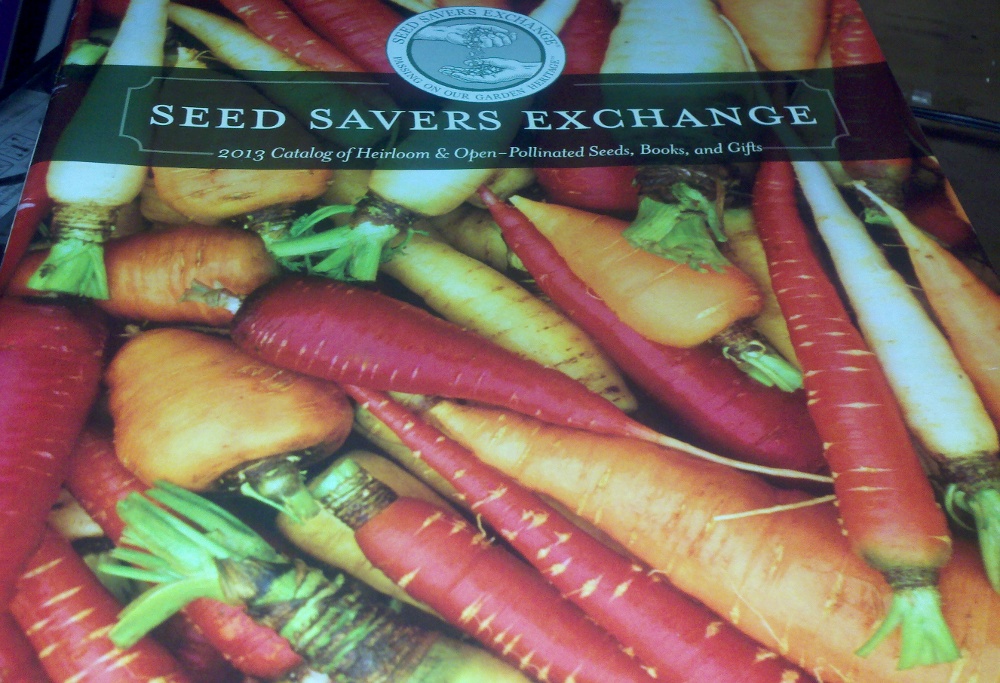
My favorite catalogs are the specialty ones, though. Sow True Seed, which covers tons of stuff and comes out of Asheville, NC, has so many amazing items to choose from. Bountiful Gardens, too, has a great selection. Then there's Territorial Seed Co., Johnny's Selected Seeds, and Seed Savers Exchange. The best part about these catalogs is that they're all open pollinated seeds, Heirlooms or organic (or both). I don't have to be careful and check every item for GMOs and connections to Monsanto because I know these companies stand head and shoulders above the others, ethically speaking.
 |
| Seed Savers Exchange |
Reading a seed catalog can be done in a variety of ways. Usually the beginning of January sees me simply paging through them, taking in all the images and some of the information. If there's anything really special I'd like to try, I'll mark it (I keep a highlighter with my catalogs!), but generally that happens later in the month.
By the end of January, I being to yearn for the warmer weather to arrive so I can put seeds out. Just as soon as the snow goes and the soil can be worked, I remind myself, I can put peas and beans out there! I start going through the catalogs in a lot more serious manner.
First, I decide on the basics. What do I always have in the garden? Tomatoes for sure, and beans, peas, cucumbers, and a variety of herbs. Do I have any of those seeds from last year that I need to use up? I check my box of seeds that sleeps in the liquor cabinet, to determine if I have left-overs from last year or seed I put away from my own crops. The remaining items on my list become the basis of my seed shopping list.
The second thing I do is figure out how many row-feet of each thing I will be planting. My raised beds are ten feet long, but with peas and cucumbers I plant on both sides of the trellis I use to hold them up, so I have to double the number of feet I need to purchase. The catalog tells you how closely you can plant things, and you can also check against the square foot gardening list to see if you can squish into a smaller space.
Once you know how many row-feet you need, and how many seeds you can plant per row-foot, you can calculate how many seeds you need. Always buy a few extra, just in case you decide to stagger your planting (a great idea for beans and peas) or you have a few holes in your row because of predators.
 |
| Information from a catalog |
 |
| Info about a Thai pepper |
Have fun with your seed catalogs! Make lists: what you need, what you want, what you expect to purchase. Figure out where each item will go in your garden. Even in the snow, you can go size things out.
By the beginning of February, you should be ready to put your order(s) in. Sometimes I can find everything I want in one catalog, but often I purchase from two, plus pick a few small packages up at the local Agway or seed exchange. Once everything is ordered, your work really begins!
Next week we'll talk about ingenious ways of making a sprouting and planting schedule, and how to get organized before the spring rush hits! (Added Jan 14: Click here to read about planting schedules!)
Listed on the Homestead Barn Hop #94!
Linked to from The HomeAcre Hop! Want to enter? Click here!
Check back often for information on canning, preserving, general homesteading and more. If you have questions or comments, please write to me below. I love to answer questions! You can follow the blog via Network Blogs and Google Friend Connect (see the left hand column for the button). If you purchase items I have linked through Amazon or the ads on my site, I receive an affiliate portion of the sale. If you find the items are useful, please purchase from my site!
You may also be interested in:
Mexican Meatloaf
Lentil Soup is a new favorite
Oyster Soup from the Little House
Winter is here!
Beef Barley Soup
Monday, December 17, 2012
Winter is here!
 |
| Snow out back of the house |
I love using the phrase, "Preparing for the zombie apocalypse," because it doesn't make anyone nervous. I'm not the type to be stressing over the end of the world, really. But I do know that emergencies happen, and that they're less likely to happen if you're prepared for them.
What emergency gear do you have in your vehicle? Remember your Rule of Threes and check your "Goodi bag" to make sure it has everything in it you need (for a great refresher check out CTJ's articles, Goodi I and Goodi II).
In the winter, especially in the colder parts of the world, you want to make sure you have a change of clothes in your car. If you fall in a snowbank or get soaked pushing the car out of a ditch, or are simply cold in whatever you're wearing, you need to be able to change into something practical, warm and dry. Two changes is great, but one is a necessity. If nothing else, pack a few pairs of extra socks. Cold feet can cause you to fall, making the whole, "I'm cold," thing even worse.
First aid kits are really important parts of any emergency bag, but especially so in winter. Be prepared to deal with frostbite, injuries from trauma (snowboarding and skiing and such), and broken bones from falls on ice. Also have on hand a manual to explain the details about winter injuries, and if you have a smartphone, consider picking up a first aid app!
 |
| Husband wrapped in camo sleep system |
If you are in an area that gets hit by fast, deep snow, you may want to invest in a tall orange or red flag that you can place on top of your car. Whether you're stuck in the car on the side of the road, or have to abandon it during an emergency, the flag will let emergency and road crews know there's a vehicle there.
On the food front, MREs are a great option for in a vehicle, both because they don't take up much space, and because the heater they contain is not dangerous to use inside the car. The vast majority of snow accidents that would leave you in your car for a time, should be solved within a day or two. A single MRE can feed one person who isn't doing hard work (ie sitting in the car staying warm) for a couple of days easily. Even one warm meal can give you hope and help you think more clearly.
The technical aspect shouldn't be ignored, either. Having your first aid app available is great, and having a GPS in your phone is also good. If you're stuck but unable to explain where you are, you can call emergency and let them home in on your phone's signal. You can use a phone to call for help, either from emergency crews or family. In order to use your phone, though, it must be charged. If you are in your car and it is turned on, put it on the charger. This assures your phone is always at full, available for you to use in any emergency.
There are tons of other suggestions for keeping yourself safe in the car. Have sand on hand to get you out of slippery situations, for instance, or kitty litter. Put blocks in the back of your car (if you have rear wheel drive) in order to give you more traction. Carry a shovel and extra gloves in case you have to deal with the elements. Some people even carry a chain saw or foldable saw, in case they're stuck behind downed trees!
What sort of things do you have in your car to help keep you safe? Please, share!
Check back often for information on canning, preserving, general homesteading and more. If you have questions or comments, please write to me below. I love to answer questions! You can follow the blog via Network Blogs and Google Friend Connect (see the left hand column for the button). If you purchase items I have linked through Amazon or the ads on my site, I receive an affiliate portion of the sale. If you find the items are useful, please purchase from my site!
You may also be interested in:
Beef Barley Soup
Got Cheese?
Rendering turkey fat
Making turkey broth from your leftovers
Protein - it's good for you!
Tuesday, March 6, 2012
The smell of dirt.


Originally all the seeds were sort of stuffed into the cardboard box you see (labelled "seeds for 2012"), because it was the best place to keep them while we were moving. Now that we're settled, however, I wanted them in a nicer place. Last year sometime, our friend Miss T gave me a beautiful garden box, sort of like a toolbox but designed for holding seeds and such. I managed to find that box this morning when I was looking for something else, and I also found sis's gardening bag (you can see it in some of the pics above; it's green) which was full of kids' gardening gloves and a wide assortment of hand tools. Yay!
I organized everything. The seeds were put into the garden box, all separated into herbs, veggies, and flowers. The ones that are open because they're already in my little greenhouse boxes were put into the drawer below the box part. My masking tape is there for labelling things, my scissors are there for cutting open seed packets, and my big black marker is there for writing on things.
I just can't wait for our snow to melt. I'll be working on digging the raised beds soon. I'm going to be digging the outline and pulling off the sod, and then hubby will rake out about a foot of dirt from the spot with the backhoe's shovel. The hole is going to be filled with punky wood, branches, etc. which will slowly compost and also help to keep water in the roots of your plants. The dirt goes back over the top, and whatever doesn't fit (hopefully a lot of it) will get mixed with sphagnum moss and potting soil and good clean compost, then put into the frames of the raised beds.
Come on, Spring! Hurry up!
Sunday, February 5, 2012
Preparing for Spring

It is time for preparation. I've pored over the seed catalogs and sketched out the the garden plans. I've gotten wonderful and amazing seeds from the Thrifty Mama on a Trailer Park Homestead to add to my box of seeds for use this year. I've been squirreling them away since last fall, when we got the house and I knew for certain we'd have a place to garden this year. I also have some dried beans and dried blue popcorn that I hope to germinate.


I had to plant something. I had to smell that incredible scent of fresh soil, and feel it between my fingers. There is a lot more to plant, and I have toilet roll tubes to use as seedling starters, as well as some of the little soil pucks that expand into seedling size bags of soil. Sometime in mid-March, the tomatoes will get started, and even a couple of cucumbers. I don't do many cukes, because they grow best outdoors in the free soil, but I find that one or two started indoors is fun for myself and the kids, and if hardened off correctly, will start bearing a week or two earlier than their younger companions. I'm such a kid when it comes to seedlings and fresh vegetables. I want more and more!


Today being a nice warm day (it was 54F earlier!), we decided to use a creosote eating log in our wood stove. Though the creosote isn't as much of a danger with the set up that we use, we figured it was better to get rid of as much of it as possible. The log has chemicals (yea I know... not great) that bind with the creosote and make it brittle. Over the next few days we'll have a bit of dust come down, and it'll all clear itself out. It's good, because our fireplace will burn much more efficiently.
What preparations are you making for spring? Are you planting in flats indoors? Sketching up your garden plans? Checking out the local CSAs to see which one fits your lifestyle and budget best? What things occupy your February time?
Monday, January 30, 2012
It's About Time: Inside the Beautiful Glass Cloche
It's About Time: Inside the Beautiful Glass Cloche:
'via Blog this'
'via Blog this'
This is an older article, from two years ago, but has some stunning pictures of glass cloches. I find myself wondering if I could do this with plastic soda bottles that have had the bottoms cut off. My garden isn't huge, but I have no way to create a greenhouse for my early plantings. This would provide a greenhouse effect without the expense (of both cash and space) of an actual glass greenhouse. I'd love to find actual glass cloches but I have never seen any in the stores or at the tag sales locally. I will have to find a way of making my own!
Subscribe to:
Posts (Atom)