Showing posts with label winter. Show all posts

Monday, October 28, 2013

Autumn on the homestead

Mint in the garden
I can't begin to explain how insane the last few months have been. It's not been BAD per se, just... hectic. I also reached a point where I was so heavy and so out of shape that working in the garden was miserable. I planted quite a few things, and got a good start on the garden, and then... wasn't able to follow through. I went on my diet, and today was the last day of the restrictive part of it. I went in at the start weighing 220 lbs (at 5'1"), grossly overweight. Today I weighed in at 196 lbs or so. I feel like I can move mountains.

I made one of those fatal mistakes: I ate like a farmer but didn't work like one. If you want to enjoy a lot of home baked breads and pastas, you have to work your rear off - literally. It's been a long time coming, but the pain and unhappiness finally pushed me to do the drastic diet that we did, and the world feels a lot better now.

I missed out on a lot of the green bean harvest, but we did get enough for part of the winter. We froze some and canned some, so that is a good thing. What's left out there on the bushes is rapidly drying out, withered by the frost and freezing temperatures. Soon I'll pick the last of them, let the seeds dry out, and put some up as soup beans and the rest as seed for next year.

The tomato bed has been put to bed, as has DD's garden bed. I'm covering each bed with cardboard and some with black plastic as well, depending on the severity of the weeds in them. A bit of wood or brick on top to keep it all secure, and the beds are all ready for the snow to fly. Over the cold months, the worms will come and munch on the cardboard, the weed seeds will bake to death and smother, and the soil will be happier than we left it. In the spring we'll put on a nice dose of compost and maybe some manure, and we'll be good to go.

While not everything went perfect this year, we're definitely ahead when it comes to next spring. The only things I really regret are that I didn't get in the asparagus or strawberries. Add another year to the wait for those... they take so long to establish. Still, the results are long lasting and delicious, so I suppose it's completely worth it.

How did your garden go this summer?

Friday, March 1, 2013

Keeping warm

Our favorite heat source
In an emergency situation in winter, such as power loss, it's important to keep warm. If you're like us, you have a wood stove and a supply of cut wood on hand for heating things up. Not everyone does, though, nor is it possible for those who live in apartments or condos. So what are the options for keeping warm, safely?

Dry wood is good (1)
Alright, so wood is always the first option I mention. Larger wood stoves, such as our Franklin style pictured above, or old fashioned wood cook stoves can be used for heat and for cooking. There are smaller backpacking versions, too. If you're able to have one hooked up and ready to go, it will make your life a lot easier in case of a power outage. In inclement winter weather, you can even get your wood stove going in advance of problems, so that if you lose power you're already ahead on keeping things warm.

Just lighting up the wood stove isn't enough, though. There's a reason that stories like the Little House series and the Anne of Green Gables books always mention the flying leap into the bed at night in the winter. That's because in the era of wood heat, you didn't heat rooms that weren't used. A bedroom comes equipped with lots of blankets and a sleeping cap, so there's no real reason for heating it. You heat kitchens and parlors, where people spend time throughout the day.

If you've seen old houses, you will notice that all the doorways either have, or are capable of having, doors in them. They aren't just passageways, as in modern homes. This is because those doors were used to keep heat where it was most needed and wanted. You might opt to open doors and heat bedrooms slightly just before retiring for the evening, but it's unlikely that you'd do so during the day. This is true in an emergency situation as well.

Whether you are heating with wood or some other method, it's important to close off the area in which you'll be staying. If there are no doors to close, hang blankets or sheets up over doorways, and be sure to cover or tape over any windows or doors that are allowing in colder air. Duct tape is a wonderful emergency tool, because you can easily cover over the cracks above and below doors for the duration, and remove it afterward.

While electric stoves won't work during a power outage, gas stoves will continue to work until you run out of fuel. Electric starters will no longer function but you should be able to start the gas and then light it with a match or long-reach lighter. Camp stoves, too, can be used for emergency cooking, as can the burners on the side of your barbecue grill. Be aware, though, that you should not use gas stoves for heating your home. Carbon monoxide can build up and smother you very quickly. A battery operated CO alarm can be a life-saver, warning you if the CO levels become dangerously high.

There are a variety of small personal heaters available on the market. HeatMax hand warmers are an example of ones to wear close to your body. If you know an emergency will be of short duration, this type of heating device can make a huge difference. If your emergency will be longer, though, it's important to consider other options.

Tents hold in heat (2)
If you find yourself without heat in the winter and you have no access to a wood stove or other non-electric device, you still have options. As mentioned above, smaller spaces are easier to heat. Set up a tent in your living room and pull in blankets and pillows. The smaller space will heat up much faster, and keep you from freezing. The hints for winter campers in Backpacker Magazine are quite useful even in the house, and will help you sleep better. When used with extreme caution, a single candle can bring up the temperature in a tent by several degrees (for a fairly safe and efficient version, check out this how-to on making a candle heater!).

If you don't happen to have a tent on hand, try draping sheets and blankets over a table, and crawling underneath. Use whatever you have on hand to trap your heat inside the smallest space possible for you and those with you. Foil "space blankets" work wonders when combined with blankets or jackets. 

Keeping warm is something your body will attempt to do on its own. Even sitting and doing very little will cause you to lose calories as your body stokes its furnace. If you find yourself getting very cold, eating a bit of high calorie food such as cheese or chocolate will get the furnace burning again, and help maintain your body temperature.

For optimum comfort, dress in layers. There will be times when the sun hits your home and it warms up considerably. Be ready to shed one or two layers and take advantage of that passive solar heat. Open curtains on the sunny side of the house and allow the light to shine in and raise the ambient temperature. Keep your head covered, especially while sleeping. We lose a lot of body heat through our heads, and a night cap will do wonders. Any wool or microfiber hat will do, or even a scarf wrapped around the head like a turban.

The most important thing in any emergency is not to panic. Be prepared, as much as you can be, and have at least an idea of what you will do to last it out. No one can be ready for everything, but if you've spent time thinking about the most likely scenarios, you'll do fine!

Shared at the Backyard Farming Connection Hop #22.

Check back often for information on canning, preserving, general homesteading and more. If you have questions or comments, please write to me below. I love to answer questions! You can follow the blog via Network Blogs and Google Friend Connect (see the left hand column for the button). If you purchase items I have linked through Amazon or the ads on my site, I receive an affiliate portion of the sale. If you find the items are useful, please purchase from my site! 
 
You may also be interested in:

Quick pesto'd pasta with oysters
A good weekend's work
Making and using greenhouses
Busy day round-up
Seedling trays

1) Image by digitaldundee / morgueFile
2) Image by Kenn W. Kiser / morgueFile

Tuesday, January 1, 2013

Lentil Soup is an new favorite!

Arabic style Lentil Soup
It's no secret that I love lentils. I like lentil loaf, lentils in soups, lentils in stews, lentils with rice in a pilaf... I just like lentils! I love that they come in different colors, and that their dusky flavor lends itself so well to pairing with strong tastes like ham.

Diced onions
I ran across Laila's Arabic Lentil Soup while on Pinterest the other day, and I just had to try the recipe. Since I was on my own, and the recipe claimed to make only two bowls of soup, that seemed just about right. However, I like a little meat in my soups, and so I modified the recipe to please myself. The result was fantastic, and I had to share it with you!

Carrots and garlic
Ingredients:
  • 2 tbsp olive oil
  • 1/2 large onion, diced
  • 1 medium carrot, peeled and diced
  • 2 cloves minced garlic
  • handful of sliced brown mushrooms
  • 3/4 cup dried brown lentils
  • 3/4 tsp ground cumin
  • 1/2 tsp salt
  • 1/2 tsp pepper
  • 4 oz cooked ham, diced

Vegetables cooking in the pot
Add the olive oil to a soup pot and bring it to a medium high heat. Add the onion and cook until it becomes soft. It took about five minutes for me, but it will depend on your pot, the temperature you're using, and your stove. I moved on while the onion was still slightly undercooked, but that is how I prefer my onion. You may want to cook until it's quite limp, or go for less time, depending on your tastes.

Lentils and cumin added
Add the garlic, ham, mushrooms and carrots and continue to cook for about 3 minutes. You might need to add a drizzle more olive oil, depending. The whole thing will become extremely good smelling as it cooks, and even if you only use one clove of garlic, it will still smell up the house in a lovely way. Add in the lentils and cumin, then stir while cooking for another minute or so. By sautéing the lentils with the vegetables, you're coating them in olive oil, which will allow them to cook better. This trick works with rice, too!

Add the water
Into the pot, add three cups of hot tap water. Sprinkle the salt and pepper on top, then bring the soup to a low boil. As soon as the boil has been reached, turn down the heat to a medium low and simmer for about 30 minutes. I suggest checking every ten minutes or so, as the lentils can absorb a lot of water. It's possible for your pot to run dry, which will result in something inedible and scorched instead of a lovely soup. Set your timer and check often, stirring when you check. If the soup needs more water, go ahead and add it, though not more than a half cup at a time. Adding a whole cup seems to water it down a bit much for my tastes.

The finished soup
Once the lentils are cooked, you are ready to move on. The lentils should still be holding their shape, but should be soft enough that they mash easily. If they're even a bit crunchy, cook longer in ten minute intervals. When they are ready, use a potato masher to smash up your pot's contents. Continue doing so until you've created a soup of the consistency you like. I enjoy having actual broth rather than mush, unlike the rest of my family, so I only spent about a minute mashing. The mashing releases the flavors of the lentils, which blend incredibly well with the cumin.

Paired with garlic bread
This is such a simple soup. It doesn't require a lot of time or attention, and it has very few ingredients. However, it's huge on flavor, and it tastes much more complex than it is. I paired the soup with some garlic cibiatta bread that I had on hand, which I drizzled with olive oil then sprinkled with good quality sea salt and broiled for a minute. The result was crispy and delicious, warm through, and a perfect foil for the hearty softness of the soup.

The soup is so simple that it's easy to get carried away with adding things. I found myself eying it in the pot with skepticism as it cooked. I thought, wouldn't it just be wonderful if I slipped a wee bit of potato in there? How about a sprinkle of fresh herbs? Surely it would taste even better with some slivers of turnip? I resisted, however, and I'm glad I did. The only thing I might add in the future to this, would be a couple of tablespoons of heavy cream or half and half, right at the end. I love creamy soups, especially ones that start with a good olive oil, and that little bit of cream would lighten up the color to a beautiful caramel shade. Since the soup is so simple, the addition of the cream would not overpower it, and would still allow the natural flavors to shine through.

What sort of things would you be tempted to add to this simple yet hearty meal?

Check back often for information on canning, preserving, general homesteading and more. If you have questions or comments, please write to me below. I love to answer questions! You can follow the blog via Network Blogs and Google Friend Connect (see the left hand column for the button). If you purchase items I have linked through Amazon or the ads on my site, I receive an affiliate portion of the sale. If you find the items are useful, please purchase from my site!
 
You may also be interested in:

Oyster Soup from the Little House
Winter is here!
Beef Barley Soup
Got Cheese?
Rendering turkey fat

Sunday, December 23, 2012

Oyster Soup from the Little House

The beginning of something wonderful...
"In all her life Laura had never tasted anything so good as that savory, fragrant, sea-tasting hot milk, with golden dots of melted cream and black specks of pepper on its top, and the little dark canned oysters at its bottom. She sipped slowly, slowly from her spoon, to keep that taste going over her tongue as long as she could." -- from By the Shores of Silver Lake by Laura Ingalls Wilder, pp 204

Anyone who knows me, knows that I have an uncontrollable fascination with the Little House series. It was my introduction to Christianity, and the reason why I invited the minister to dinner when we moved to New England (Ma insisted it was right and proper, so therefore it was what I ought to do, yes?). I've been through the series so many times that I've had to buy new copies on several occasions, the older ones having worn out. I learned morals and ethics from them. For me, Laura and Ma and Pa and the other people there are just as real as you and me.

Several years ago (several severals of years ago), I was living on the west coast and had managed to become unemployed and rather destitute. I was scraping by on unemployment insurance payments, but it was pretty dicey. My partner D and I were approaching the Christmas and Yule season with as much joy as we could muster. After all, we had a roof over our heads, heat, and each other. It was lean, but love fills a lot of gaps.

Some kind soul had told the local fire department that we were living lean over the season, and a soft spoken gentleman brought us a hamper of food. I tried to protest, but he insisted that it was alright, we weren't taking anything from someone else. I'll admit, once he was gone, I tore into that box like ... well, like it was Christmas morning. D and I went through the rice and pasta, a tiny canned ham, some fresh vegetables, and then at the very bottom we found the single precious can of smoked oysters.

We could have eaten that can of oysters in two seconds. We're both in love with them, their smoky flavor, savory and oily... But I looked at him and ran to the book shelf. I pulled out "By the Shores of Silver Lake" and went skimming through it to find the New Year's Eve scene. There it was, Laura's description of the oyster soup Ma had made for their guests. He and I started laughing, and we recreated that soup for Christmas Eve for ourselves. It was a wonderful meal.

This year, I wanted to make the soup again. I remember how delicious it was way back when I was barely an adult. Tastes change, though, and I wondered if it would still be as magical. I picked up three cans of cheap smoked oysters and sacrificed some of my coffee half-and-half, and made the soup as a starter to our Yule meal last night.

Everyone enjoyed it. I made enough that I assumed there would be much in the way of leftovers, but there wasn't. Barely a drop was left in my soup tureen when we were done! It was just as Laura described it, with the oil and butter, the salty sea taste.

Merry Yuletide, my readers, and Merry Christmas as well. I hope you will enjoy this (terrifically easy) delicious soup as much as I and our guests did.

Oyster Soup
  • 6 tsp butter
  • 1 cup minced onion
  • 3 cans oysters
  • 1 to 2 quarts half-and-half
  • salt, pepper, paprika  to taste
  • parsley and oyster crackers for garnish
In a soup pot, melt the butter. When it is just starting to sizzle and is completely melted, add the minced onions, and cook for two or three minutes, until it begins to soften. Add the oysters, oil and all, and cook for another two minutes. Add the cream and spices, and heat until it just begins to boil. Sprinkle with parsley, stir, and ladle into bowls. Serve with the oyster crackers on the side.

Literally, this soup takes ten minutes to make, but it tastes like you spent hours fussing over it. It also does fine if you make it earlier and then re-heat it just before serving. That's what I ended up doing, because we had too many things that needed to be on the stove top at the last minute. It turned out incredible. Enjoy!

Check back often for information on canning, preserving, general homesteading and more. If you have questions or comments, please write to me below. I love to answer questions! You can follow the blog via Network Blogs and Google Friend Connect (see the left hand column for the button). If you purchase items I have linked through Amazon or the ads on my site, I receive an affiliate portion of the sale. If you find the items are useful, please purchase from my site!
 
You may also be interested in:

Winter is here!
Beef Barley Soup
Got Cheese?
Rendering turkey fat
Making turkey broth from your leftovers

Monday, December 17, 2012

Winter is here!

Snow out back of the house
Well, winter is sort of here (though certainly not in a truly New England proper way). It's definitely time to double-check all the safety procedures for your vehicle and person. You might think your car is pretty safe (and you'd be correct), but there's always the chance of skidding off the road, being in an accident caused by someone else, or the variety of "Acts of God" that sometimes just happen.

I love using the phrase, "Preparing for the zombie apocalypse," because it doesn't make anyone nervous. I'm not the type to be stressing over the end of the world, really. But I do know that emergencies happen, and that they're less likely to happen if you're prepared for them.

What emergency gear do you have in your vehicle? Remember your Rule of Threes and check your "Goodi bag" to make sure it has everything in it you need (for a great refresher check out CTJ's articles, Goodi I and Goodi II).

In the winter, especially in the colder parts of the world, you want to make sure you have a change of clothes in your car. If you fall in a snowbank or get soaked pushing the car out of a ditch, or are simply cold in whatever you're wearing, you need to be able to change into something practical, warm and dry. Two changes is great, but one is a necessity. If nothing else, pack a few pairs of extra socks. Cold feet can cause you to fall, making the whole, "I'm cold," thing even worse.

First aid kits are really important parts of any emergency bag, but especially so in winter. Be prepared to deal with frostbite, injuries from trauma (snowboarding and skiing and such), and broken bones from falls on ice. Also have on hand a manual to explain the details about winter injuries, and if you have a smartphone, consider picking up a first aid app!

Husband wrapped in camo sleep system
Along with your extra clothing, have a good quality sleeping bag or sleep system in your vehicle. You can stay in your car for a very long time and still be alright if you have blankets and sleeping bags and warm clothing, as your car makes a VERY good shelter.

If you are in an area that gets hit by fast, deep snow, you may want to invest in a tall orange or red flag that you can place on top of your car. Whether you're stuck in the car on the side of the road, or have to abandon it during an emergency, the flag will let emergency and road crews know there's a vehicle there.

On the food front, MREs are a great option for in a vehicle, both because they don't take up much space, and because the heater they contain is not dangerous to use inside the car. The vast majority of snow accidents that would leave you in your car for a time, should be solved within a day or two. A single MRE can feed one person who isn't doing hard work (ie sitting in the car staying warm) for a couple of days easily. Even one warm meal can give you hope and help you think more clearly.

The technical aspect shouldn't be ignored, either. Having your first aid app available is great, and having a GPS in your phone is also good. If you're stuck but unable to explain where you are, you can call emergency and let them home in on your phone's signal. You can use a phone to call for help, either from emergency crews or family. In order to use your phone, though, it must be charged. If you are in your car and it is turned on, put it on the charger. This assures your phone is always at full, available for you to use in any emergency.

There are tons of other suggestions for keeping yourself safe in the car. Have sand on hand to get you out of slippery situations, for instance, or kitty litter. Put blocks in the back of your car (if you have rear wheel drive) in order to give you more traction. Carry a shovel and extra gloves in case you have to deal with the elements. Some people even carry a chain saw or foldable saw, in case they're stuck behind downed trees!

What sort of things do you have in your car to help keep you safe? Please, share!

Check back often for information on canning, preserving, general homesteading and more. If you have questions or comments, please write to me below. I love to answer questions! You can follow the blog via Network Blogs and Google Friend Connect (see the left hand column for the button). If you purchase items I have linked through Amazon or the ads on my site, I receive an affiliate portion of the sale. If you find the items are useful, please purchase from my site!
 
You may also be interested in:

Beef Barley Soup
Got Cheese?
Rendering turkey fat
Making turkey broth from your leftovers
Protein - it's good for you!

Thursday, October 25, 2012

Danger, Will Robinson!

A gas generator (1)
I keep an eye on the weather throughout the day using a website called Wunderground. This morning, they sent me an email saying that their usual "winter preparedness" email series was being suspended because they wanted to do an emergency preparation series instead, ahead of the storm that's heading our way. I went to their website to check out all the details. The storm we need to watch, called Sandy, is currently (2:30pm EDT on Thursday, October 25, 2012) a category 2 hurricane coming through Haiti and into the Florida area.

Go grocery shopping (2)
Sandy may be downgraded to a nor'easter by the time it gets to New England where we are, but they are warning not to consider that lightly. Apparently, it's a 50% chance whether it'll head out to sea, or hit us square on. NOAA and other weather agencies are urging people along the coast and throughout New England (and New York City as well) to be prepared for emergency conditions. Part of the problem right now is that the autumn weather is not cooperating. They can't tell which way the wind will blow things, nor can they tell whether it will be warm and produce rainfall, or if it'll be cold and come down on us as hail, sleet or snow.

The bottom line is, be prepared. This doesn't mean you need to be ready for the Zombie Apocalypse, but it does mean making some common sense decisions now, well in advance of the possible storm.

Let's look at the whole Rule of Threes thing in regards to our potential storm. Those of us who may be in the storm's path should do what we can so that we're not a burden on the system. We can last three minutes without air (first aid), three hours without shelter, three days without water, three weeks without food and three months without hope.

Three minutes without air in this storm translates into being ready for possible household emergencies.  Is your first aid kit stocked up? Do you have bandaids, enough of the usual medications and vitamins, and a good supply of ibuprofen and acetaminophen? Consider the kind of injuries you might have to deal with during a three day storm with no power, and be ready for them.

Three hours without shelter isn't as difficult when you're already in your own home. If you lose power and have no other means of heat, wear several layers of clothing, close off all but one or two rooms of your house, and keep everyone in that small, confined area. Cover windows with thick blankets at night to hold heat in, and let the sun in during the day for as much passive solar energy as you can get. Break out the winter coats, gloves and shoes, and don't forget hats! A sleeping bag can keep you (or you and a child) warm, but you might be warmer if you and your whole family snuggle together in one place under the same batch of blankets. There's a reason Alaskan sled drivers used to sleep with their dogs!
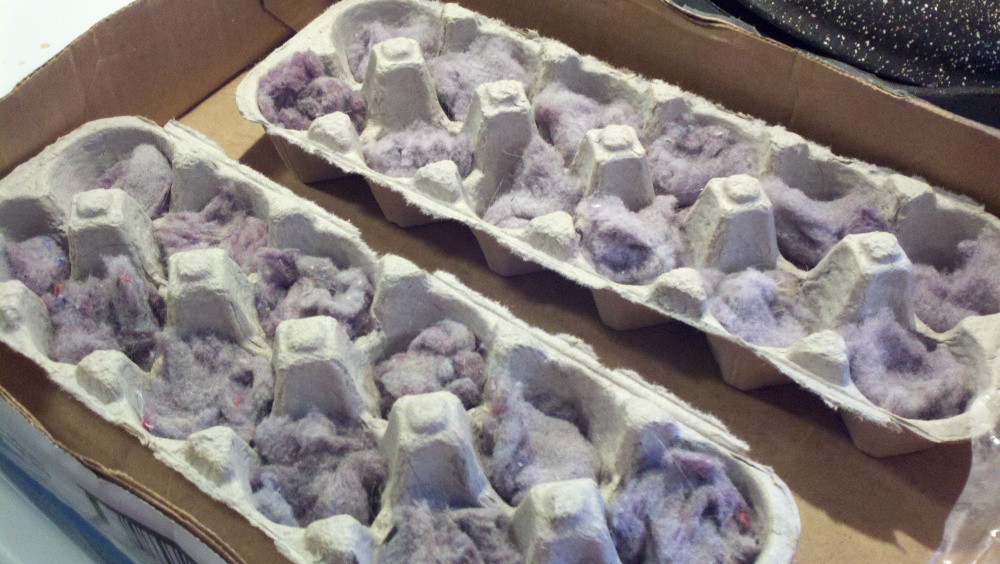
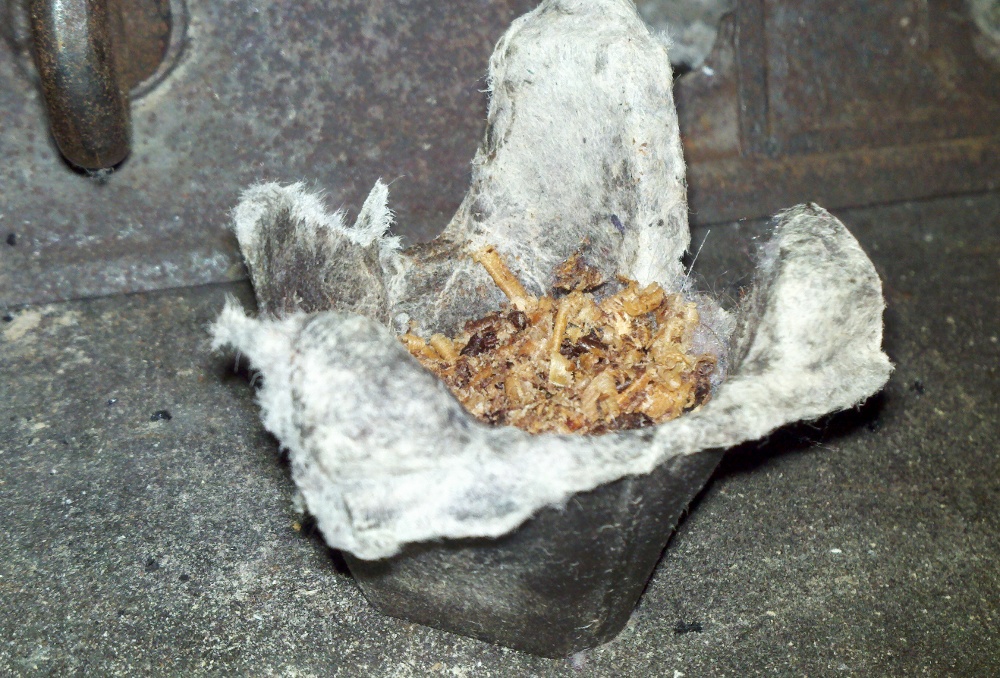
Got fuel? (3)
Of course, if you have a fireplace or wood stove, make certain you have enough wood or coal on hand to see you through the emergency. Have the fuel in a spot that's easy to get to, and as much out of the elements as possible. Have tinder and small pieces of wood on hand to make starting your fire easier. If you run a generator, ensure it's full, and have an extra gas can on hand, and don't run it all the time (turn it on long enough to cool your fridge and freezer and run the hot water for bathing, then off again to conserve fuel).

Three days without water is unlikely to be a problem during a storm in New England, but having clean, potable water might be problematic. Do you have a way to filter water so it's safe to drink? Can you store some in clean milk jugs just in case you need it? At a minimum you'll want one liter of water per person per day, but if you're at home and you have the ability to store more, then do so. Water can be used for washing, drinking, flushing the toilet manually, brushing teeth, cooking, and a hundred other things.

Three weeks without food should not be a problem for anyone with the amount of advance warning we're getting about this storm. If you're not the type to keep a lot of food on hand, pop out to the store now and get some extra bread and milk, and any other staples that will be easy to cook with what you have on hand and that will last in the pantry if you don't have to use them.

Three months without hope doesn't seem to be something that would be an issue with the upcoming storm, but don't dismiss it so quickly. You may be stuck in the house with children or friends for a few days, and having some cards on hand for poker or euchre, or a board game or two, is easy to do. Pick up some popcorn at the store and have an old fashioned night of popcorn and story telling. Grab a few books and have them stashed in the room you'll retreat to if you lose power, and maybe have a craft or two ready to work on as well.

Cars get buried. (4)
All of the above might seem like over-kill, but consider for a moment the possibility of this storm (or another) catching you unawares in your vehicle. You've become blinded by snow or driving sleet, and you pull over. You're prepared, having a "get home" bag available to pull some food out of, and some warm clothes. You decide to wait it out, a sensible thing to do. Come morning, you wake up to find your car is thoroughly buried in snow, and you can't get out. What happens now?

If you're prepared, it's not going to be a problem. People will have at least a vague idea of where you are. You can expect outside help within a reasonable amount of time. If you're prepared, it might be uncomfortable but it won't be a panic situation, nor will it be a disaster.

Be prepared! Don't let yourself fall into the trap of thinking "preppers" are just doomsday prophets calling for the end of society. In reality, "preppers" were (and are) people like your grandparents, who put up food from their garden and who saved every penny to make sure they had what they needed. They're people who have the necessities on hand or know how to make them should something (like a surprise snow storm) happen. They're you, and me, and your neighbors, ready for whatever the New England weather throws at them.

Check back often for information on canning, preserving, general homesteading and more. If you have questions or comments, please write to me below. I love to answer questions! You can follow the blog via Network Blogs and Google Friend Connect (see the left hand column for the button). If you purchase items I have linked through Amazon or the ads on my site, I receive an affiliate portion of the sale. If you find the items are useful, please purchase from my site!
 
You may also be interested in:

Cooking without electricity
Making dilled green tomatoes
Ham and Bean soup
Learning at the Freehold
The Fall and Winter Update, 2012


1) Image by Calvin Ho Jiang Lim / Wikimedia Commons
2) Image by David Shankbone / Wikimedia Commons
3) Image by MJCdetroit / Wikimedia Commons
4) Image by woodley wonderworks / Wikimedia Commons

Saturday, October 6, 2012

The fall and winter update, 2012


The garden was wildly successful this year, in my opinion. Although not everything grew as well as expected, this was the very first year (with little to no preparation, I might add) at our new home. The expectation for this year was pretty low, because of a variety of factors including lack of money to put into the whole thing.

The regular raised beds worked wonderfully well. The "corn field" didn't create as full cobs as I'd hoped, but that was more because of how late I planted it. Had I put the corn seed in the ground a month earlier, when it was supposed to go in, we'd have been swimming in corn. As it was, we've had a few decent ears and quite a few baby corn, and lots of pretty stalks for decorating with.

The tire raised beds worked fantastically. I want more of these for next year, no question at all. They take a lot of dirt to fill, but we got most of it for free from our dump (which has a huge compost pile that farmers use for manure and rotted vegetables and such). I can't praise the tire gardens enough. For root crops they were perfect, because the soil inside was not compacted and had been largely picked through to remove major rocks and sticks. This left the soil in perfect condition to host carrots and beets. My only "real" issue was that the soil was so rich that the tomatoes I planted in there were bushy with almost no fruit!

The girl child's square foot garden wasn't as successful as the other gardens. The squash, watermelon and peas didn't do as well. I think part of the problem is that it didn't have enough compost in it. Next year it will be built one more level higher, with additional soil, which should make a difference. Being so low to the ground, I think it was inviting critters to come have salad and squash. Still, her tomatoes did take off, and are still producing!

The potato towers came down a while ago, and were only mildly successful. If I were to try them again, I would have to put a soaker hose inside the tower, either in the center or spiraling up the middle. I think the major problem was that the tower dried out incredibly quickly, and that stunted the potato growth. We also got some stink bugs and potato bugs, which didn't help matters. Of course, had the plants been strong and healthy to begin with, we'd have had less issues!

We still have to put in the asparagus and strawberry beds, as well as the fruit trees and bushes we want. I have to plant some ground cherries, as well, because we really enjoy eating them. I hope to build the shade beds before the snow comes, but we'll see what happens. There's so much going on, I'm not sure I can manage it.

That's the winter update, folks. As always, don't be afraid to ask questions. There will be more coming up on canning, dehydrating, long term storage, emergency first aid, and dozens of other hot topics, so keep checking back!

Check back often for information on canning, preserving, general homesteading and more. If you have questions or comments, please write to me below. I love to answer questions! You can follow the blog via Network Blogs and Google Friend Connect (see the left hand column for the button). If you purchase items I have linked through Amazon or the ads on my site, I receive an affiliate portion of the sale. If you find the items are useful, please purchase from my site!
 
You may also be interested in:


Making your own fire starters
Using a FoodSaver
How to make liquid laundry soap
Creamy Crab Pesto with pasta
Pressure canning - don't be scared

Tuesday, October 2, 2012

Making your own firestarters

A home-made firestarter
I love fires, and we're just entering the season for it. The nights are cold, sometimes hovering down around freezing, and even the afternoons are chilly with the overcast skies and the on-again off-again rain. While we aren't at the moment of winter, where the fireplace gets lit and stays lit until spring, it's definitely that time when we occasionally decide we want the house warmer than it is on its own. There's something emotionally boosting about a nice wood fire, too, that tells you you're safe and snug in your own home. It's a sense of security like no other.

The basics
Starting a fire in damp weather can be a real hassle. Struggling with paper or cardboard, chemical starter logs, or tinder that isn't quite dry is frustrating and it takes away from the enjoyment of your fire. It can also pump a lot of smoke into your house, which is not good. Rather than pay for expensive firestarters, why not make your own? They're so simply and easy, and are made from things found around the average house. It takes only a few minutes to put them together, and a couple of hours to let them dry and cool, and you'll have dozens sitting ready to light up your fire.

Lint makes great tinder
Begin with the basics of the firestarter: an egg carton (or several), some wax (bee's wax, paraffin, or left over candle stubs are all fine), a pile of dryer lint and some wood shavings or finely shredded paper. I tend to make firestarters around canning time, so I use the wooden boxes the jars come in as holders. Since the boxes are covered in a somewhat waxy substance, and are also plastic wrapped, you don't have to worry about the melted wax weeping onto any furniture or table tops. You could also sit them on folded newspaper or old cardboard boxes.

Melt your wax
In a pot that you don't care about (once it's held melted wax it will no longer be good for anything else), melt up your wax. I have a metal bowl that works very well for this, but you could just as easily pick up an old double boiler or pot at Sally Ann or Goodwill. Set your stove to a medium high heat, and don't leave. Wax is flammable, and needs to be tended. Luckily, this stage doesn't take very long. About five minutes will melt a block of paraffin wax the size of an apple. If you see smoke, turn down your heat a little bit, as it can scorch the wax and could lead to a fire. If you spill wax on your counters or stove, wait for it to cool and then pop it off using a plastic knife or spatula.

Fill the cups with lint
While your wax is melting, you can work on the body of your firestarters. Rip the tops off your egg cartons, because there's no use for them in this. The lip that keeps the lid closed can go, too. Place your egg cartons onto whatever safe base you have, and then fill each egg cup with about a tablespoon of lint. It doesn't matter what color or texture the lint is. All lint burns very quickly, and so it makes excellent tinder. Some campers keep a tiny zip baggie filled with lint for starting their campfires easily.

Add the wood shavings
My partner happens to like doing wood working, and so there's always a ready supply of wood shavings from his planer for me to use in making firestarters (or to use as mulch in the garden). I add some of the wood shavings to the wax because it makes it easier to pour. However, you can also tuck the wood shavings into the egg cups with the lint, then pour the plain wax over the whole thing. Either way is acceptable. It's a personal choice.

Pour in the wax
Pour the wax into the egg cups as evenly as you can, making sure to coat the lint and wood shavings completely. The wax acts just as candle was does, protecting the wick from burning up too quickly. It also keeps the lint and wood very dry, which allows you to use them even in damp or wet weather.

A single firestarter
Let your wax dry and cool completely before doing anything else. Once it's cool, you can cut the egg cups into separate pieces and store them in a zip baggie or plastic container. Each firestarter should burn for 3 to 10 minutes depending on the size, amount of lint and wood, and amount of wax used. For a fire designed to heat the house, I will lay down a piece or two of newspaper, place a firestarter at either end of the woodstove, then place small bits of wood on top of that. I then light the newspaper, which in turn lights the firestarters. As the fire picks up, I add medium then large pieces of wood.

Light it up
For a camp fire or a fire that you're starting without paper, it's quite easy to light the firestarters. Using a match or lighter, just set fire to one corner of the egg carton and it should immediately catch. Be sure to have the firestarter where you want it before lighting it, because they catch very quick and burn very hot. Provided you're not using green, wet wood, it ought to begin to smoke and burn within a few minutes.

It really is that easy. I love making my own firestarters, and the kids help with portions of the creation, too. They love playing with dryer lint, and will happily stuff egg cups for me while I'm preparing the wax. The starters do a great job of getting most any fire going well, including outdoor fires for camping and such.

The following video is a short view of one of my firestarters burning merrily in the fireplace at my home. You can see how well it catches, and how steadily it burns. The video should give you a good idea of what your final product should look like.


Saturday, January 15, 2011

Baby, it's COLD outside!

Right now, Weather Underground says it's 2.8 degrees F out there. Dang, that's cold. The house is pretty warm, thanks to the old wood furnace down in the basement. Behemoth it might be, but it continues to chug along consistently. Sure, it only has two settings: nuclear blast, and off... but there's heat in this house. My room is a bit chilly at 65F, but that's my own choice. I'd rather have it a bit chill than a bit hot, because it's easy to pile blankets on top of myself. Once you're naked, though, there isn't any cooler you can get without opening windows. With 2F weather, I don't think I want to open windows...

Tomorrow, we have many things that need doing. We have to get the snow off the roof of the trailer, as it's currently got a slow leak that's dripping inside, and we want that taken care of immediately. Once the snow is off, we'll put a plastic liner over it, just to be certain no further snow melts and dribbles inside. That should take care of that, although it might be a bit of a hassle figuring out how to get the plastic to cover the antenna and such. We'll figure it out, though.

The other thing I want to do, and I don't know if we'll get around to it, is go up to camp to get our ladder. We can't take any vehicles, because none of the ones we have will make it up there in two foot snow. It's pretty deep up there. I suspect Gray and I will be trudging up in our boots lined with plastic bags (for both warmth and dryness), fetching the ladder, and carrying it back down. It isn't a long hike, but even in good weather it can take a bit of energy. In this cold, with the amount of untouched snow we'll have to push our way through, I suspect it'll be a half day journey. That's okay, though. It's good exercise, it gets us out into the sunlight and fresh air, and it's just amazing the things you see out there.

Maybe I'll break out my snowshoes, and get Gray to help me jury rig them so they work well enough. If I can get them on right, I should be able to get up to camp much easier. I won't have to fight my way through the snow; instead I'll be able to go over it. It would mean I made the trip alone rather than with Gray, and my knees will be sore from the snowshoe waddle, but it might strip a couple of hours off of the trip. I guess we'll see.

There's more snow on the way, they say. Not much, only an inch or two, but still! I'm really enjoying the winter wonderland out there. Winter is finally here, and it's beautiful and silent and crisp and clean and clear. When you look up at the sky outside, you can see billions of stars. The moon and closer stars shine so brightly it lights up the night! You can hear more, too, because the snow causes sound to carry farther. Walking in the woods in the snow is much more silent than in the summer, but has its own particular sounds. I love the packed crunch sound when you walk on it, especially when there's no ambient sound around to drown it out.

I'm glad to be inside with my jasmine tea and my quilts and blankets. Now I'm going to turn out the light and snuggle deep down under the warm, heavy covers. I'm going to tuck a spare pillow over my head to help keep the heat in (by morning it'll be 55F or less in my room!), and I'm going to pull all the blankets around me to make a cozy nest. Then I'm going to go to sleep, happy as a rabbit in its burrow, deep underground.